Floor Plan Builder has received a major update with the introduction of new folder tools, designed to improve how event plans are organised within the platform. This feature has been highly requested—particularly by larger client teams which see hundreds of plans created each month. The intuitive drag-and-drop functionality for moving plans between folders, along with options to rename, delete, and archive plans significantly improve the organisation of event plans in Visrez. Our development team has added the ability to Archive plans into an archive in the event that someone deletes a plan and later needs to restore it. Given the growth of the Floor Plan Builder in recent years, the addition of folders is an important step toward improving the user experience. As there are no restrictions on user numbers in Visrez, client teams can contain a large number of users and our team recognised that a more robust folder system was essential for the smooth day-to-day operation for Floor Plan Builder clients.
This brings immersive experiences to life allowing videos to be displayed on screens inside event plans. Each account now features a small library of abstract video graphics which can be placed on screens. Alternatively you can upload a custom video to your library and display it on a screen. Our team will add support for Video URL embedding so you can copy & paste a video URL to play on a screen or video wall. Below is an example of a custom request where the venue featured immersive video walls. This works in the same way as adding a logo or videos to a screen to create a powerful immersive effect.
Following up on the great response from our July release we have added another lighting control for the house lights in any space. This is really cool and as it allows wall lights to be turned up or down for added atmosphere in your event plans. Please note for existing event spaces this requires a quick adjustment to the code so this feature is available on demand and can be requested through the support channel.
In response to popular demand, our team has created enhanced light controls in the Floor Plan Builder. These new tools include Bulb Lights and Spot Lights which bring a new level of realism to 3D event plans and are incredibly fun to use. Our new light tools will help sales team convert more group enquiries by adding atmosphere and ambience which is guaranteed engage clients during their venue selection.
Our team has added a collection of more than two hundred event plan templates covering the most common event styles. Plan templates can be adjusted in size using a new feature located in the spacing tools menu. Event plans can be copied & pasted into custom spaces and provide a great source of inspiration to our users. The idea behind this update is to reduce the learning curve for new users in Visrez and to allow partners to create plans without needing to get custom spaces built out first. Our design team has done an incredible job in putting together over 200 event templates, packed with cool objects and layouts.
The release also includes the new ‘skybox‘ which brings plans to life with a bluesky background with the option to toggle between different times of the day and add enhanced shadows to the plans. Feedback so far has been really positive and users love the new bluesky background canvas whilst working in the builder.
The February 2025 release includes an enhanced ‘spotlight tool‘, advanced ‘select, move and rotate‘ tools and a new ‘elevation tool’ which allows objects to be suspended at any height in the event plan. These are great updates to the builder which are demonstrated in the video below.
Thousands of Event Professionals, Sales and Operations teams use Visrez to create professional 3D Plans. Visrez has grown by word of mouth with no outside investment thanks to the quality of our products and customer support. Our team constantly improves the platform based on user feedback, releasing new features monthly with no upgrades fees. Every account gets the same software regardless of the number of spaces activated and clients can manage their own teams without limits on user numbers.
Users can drag & drop objects from the collection into the plan which is suited for objects which are not used in larger quantities. So for single objects you can just pull one straight from the collection panel and place on the floor of the plan.
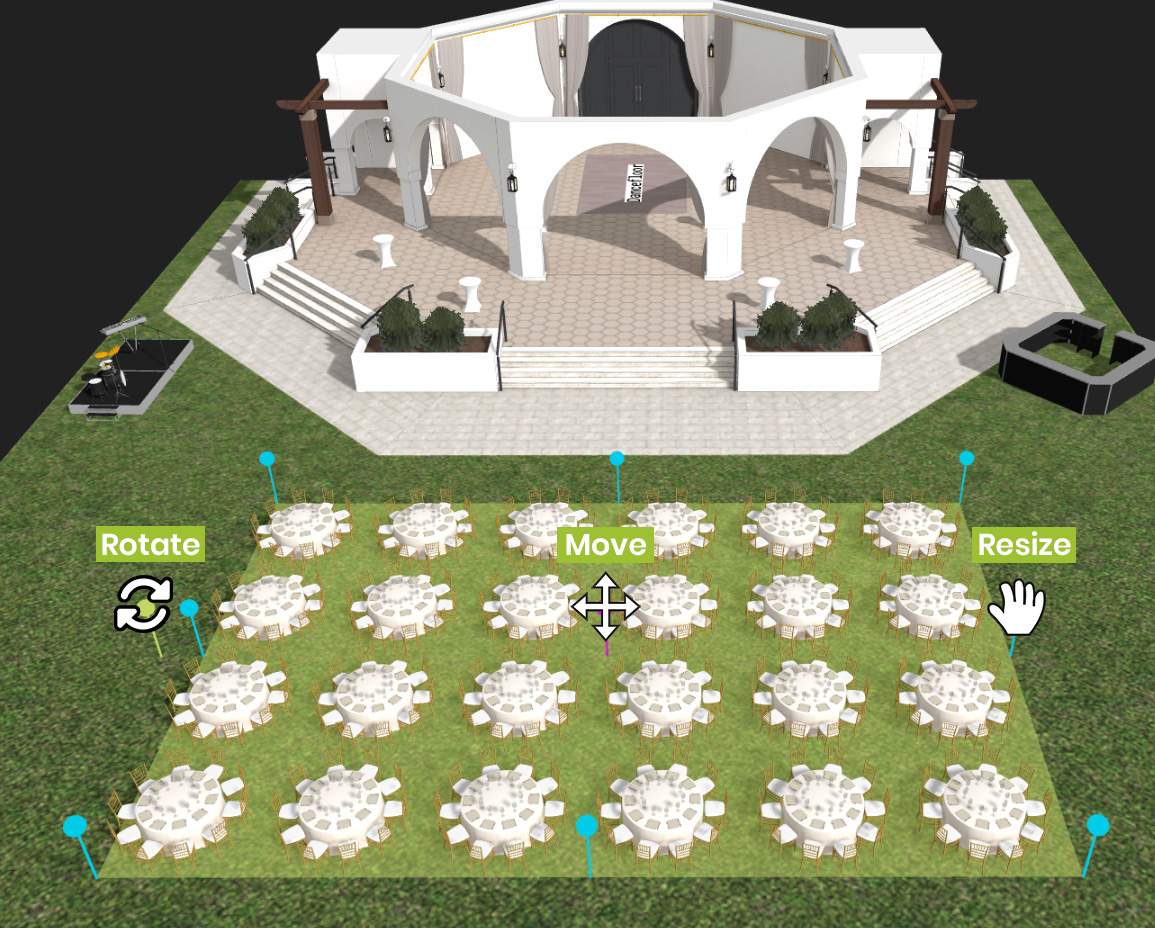
The latest release combines the blue expand circles with the move and rotate tools. Now by clicking on any single object or block of objects in your plan you can increase that block using the blue expand circles.
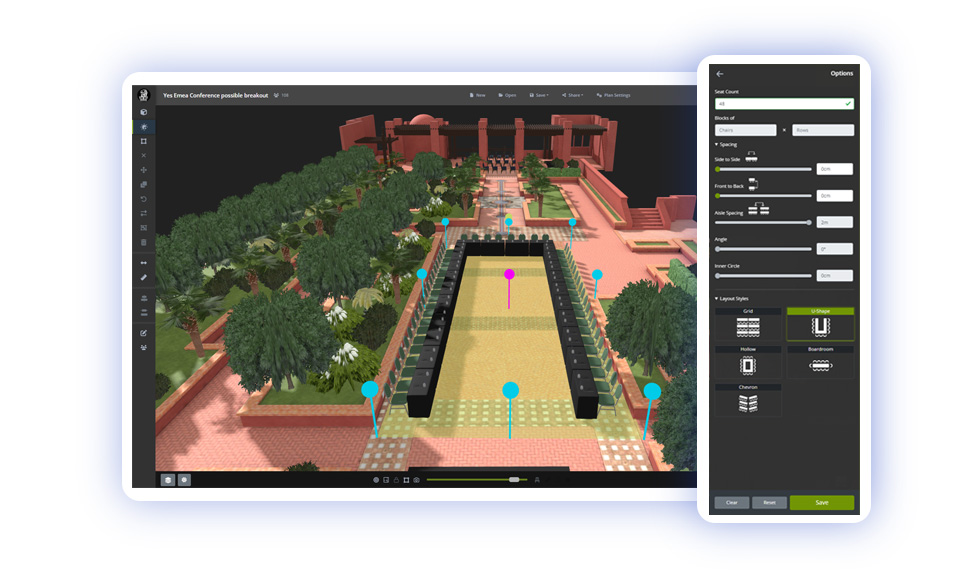
The Build Tool allows users to create plans in many different ways and is fun to work with. Users can specify the exact number of objects or draw with the mouse to fill the space. Sliders adjust the front to back or side to side spacing and you can also set the Aisle spacing or inner diameter for circle or semi-circle layouts.
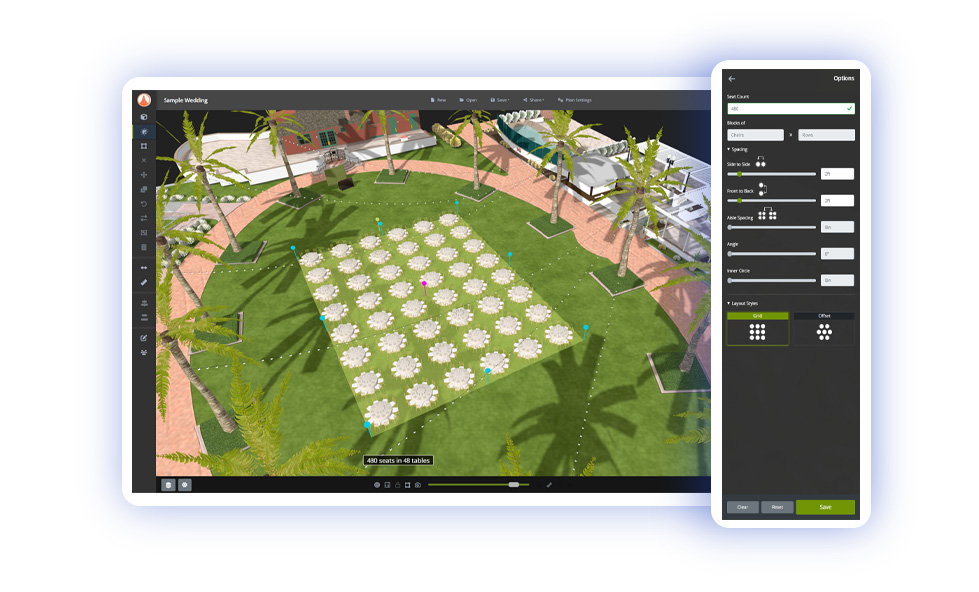
Leaving the number field empty allows you to draw a set-up by clicking and dragging the mouse inside the spаce. You can increase or decrease the selected area using the blue markers to add more objects.
All styles can be adjusted using the layout style buttons and the object spacing allows you to increase or decrease the amount of spacing between furniture. Once the set looks good, click Save or Clear to start over.

In the top right corner you will see the User Guides which explains everything about the builder.
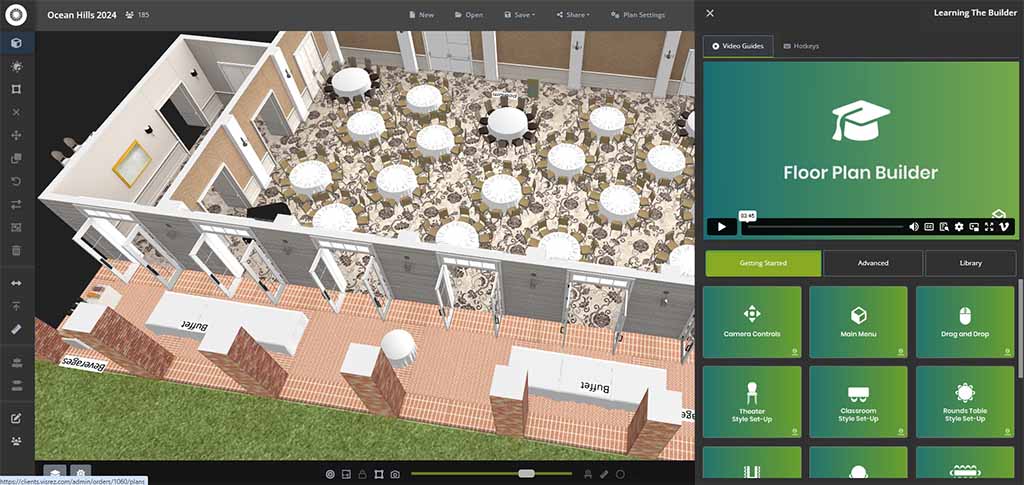
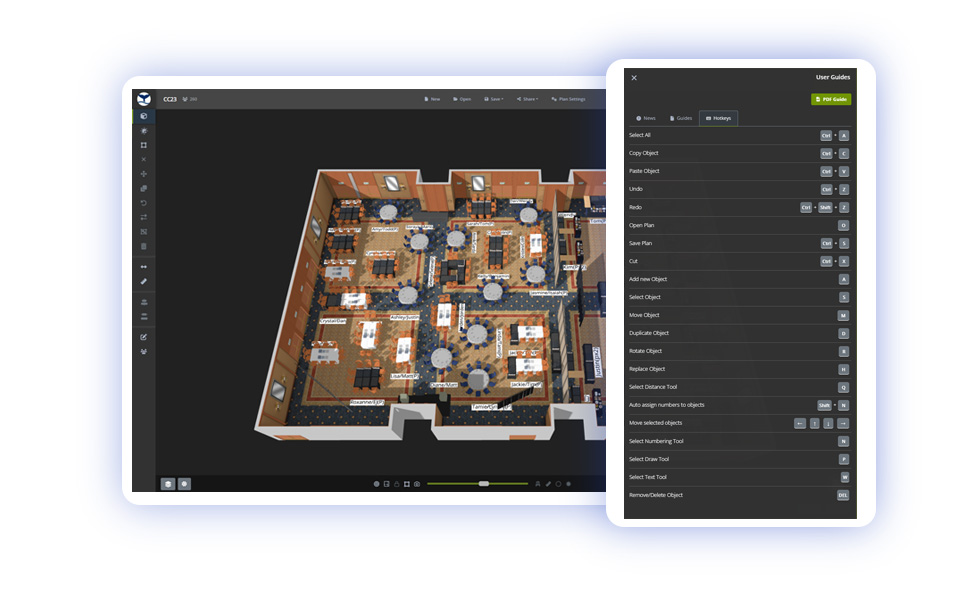
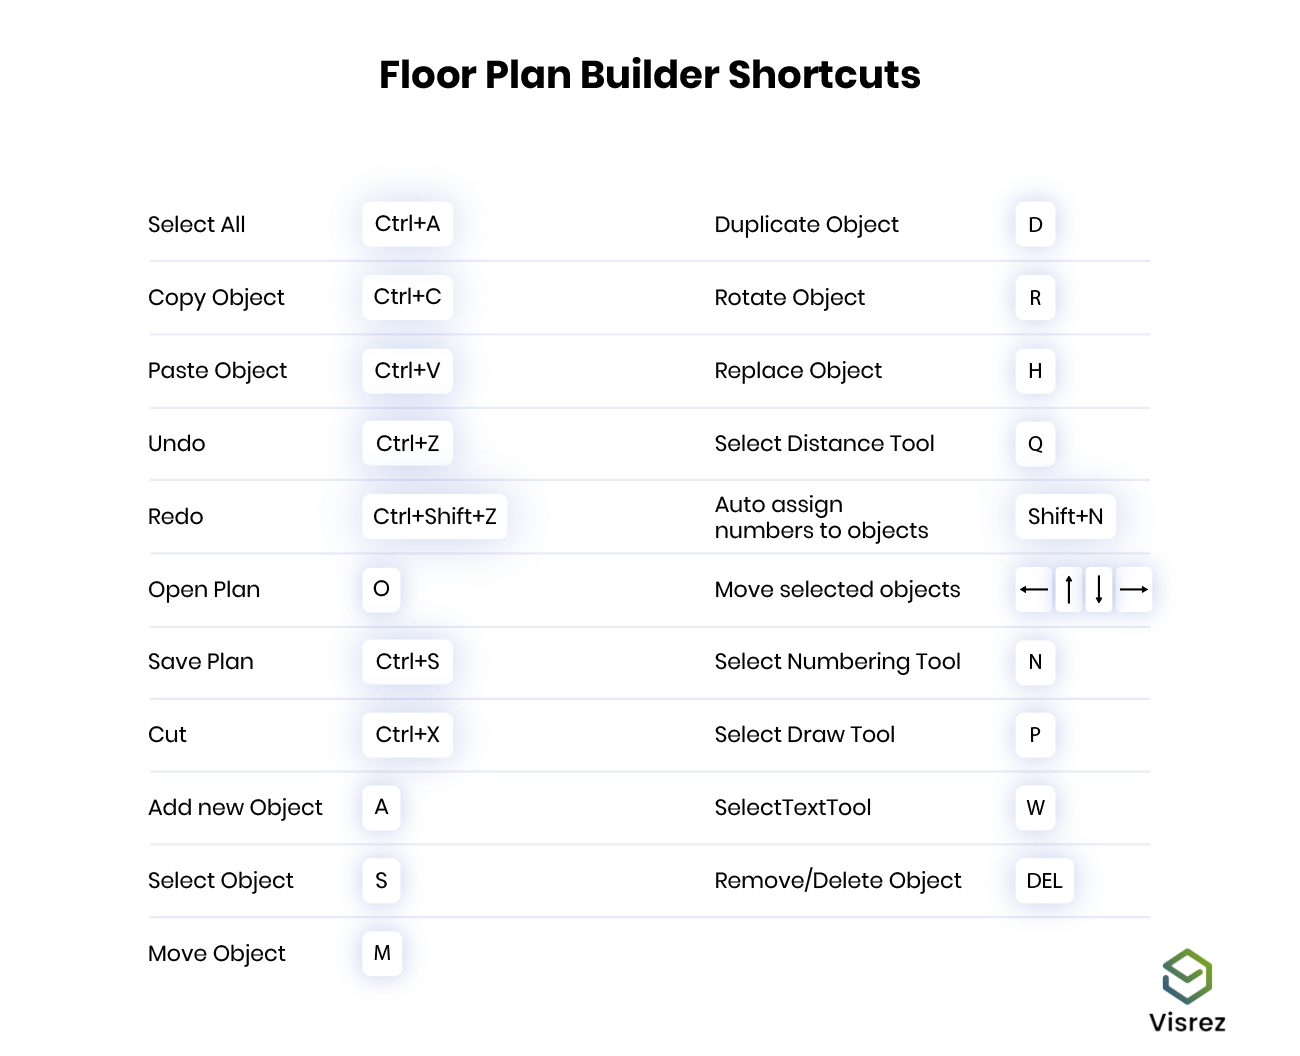
A list of shortcut keys is in the top right corner of your builder, we recommend learning these keys.
The lock function allows you to stop the room from rotating and is an ideal way for users to work in 2D format by first clicking on the Top-Down button in the lower menu and then clicking on lock the camera. This holds the space in a 2D top down position allowing ubjects can be selected, moved, duplicated or rotated without the space moving. Users can zoom in / out of the space without moving it sideways which allows you to create perfect 2D plans.
Selecting objects with the mouse in a standard shaped space is simple but as we all know spaces can come in all shapes and size. If you need to diagram in an unusual shaped space the select tool can drag against the way you actually need it to go. For example in a diagonal or non-standard shaped space you may want the select tool to go in line with the room or furniture but it doesn’t. To solve this problem our team developed a feature to allow users to toggle the direction of the select tool in line with the direction of the space.
In the bottom left corner of the menu you will find the layers tool. This tool opens up a right side panel which contains a list of the elements within your space which can be turned on-off. Airwalls can be represented by a number or letter which allows them to be opened or closed. They can either be fully opened or closed. To partially divide a space it is recommended to use a room divider object from the Visrez library.
The carpets and flooring elements in a space can also be deactivated using the layers tool as quite often the design pattern on carpets can be quite busy and make it difficult to view the furniture in the plan.
In some event spaces there can be fixed seating elements which can be removed as a block to allow different furniture to be set-up in those areas.

In outdoor event spaces layers can be used to switch off elements such as trees, string lights or fixed objects such as tents, gazebos or catering trucks to allow you to build the plan without the distraction.

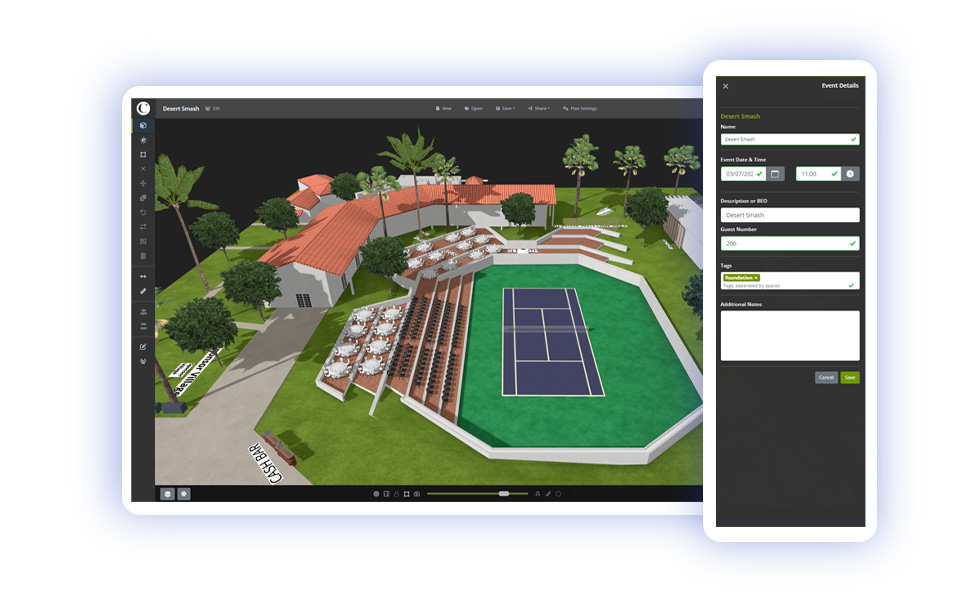
In the bottom horizontal menu there is a settings icon which does a couple of things. You can switch the builder background from black to white and adjust the level of sunlight in the plans based on the time of day. This is a great way to bring outdoor event plans to life by showing where the sun will be throughout the event.
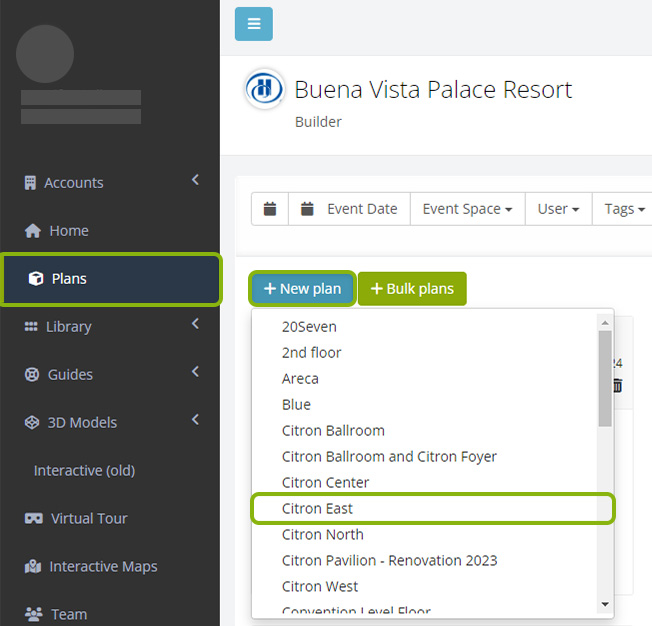
To start a new event plan go to the Plans page, and select Space from the dropdown menu. This will open up a blank builder of that space to allow you to create a plan using an empty space. Inside your builder you can also find all the plans created by all team members by clicking on the Open button in the top menu.
The Visrez Library is built into every user account and shared with all team members. Any object from the Visrez library can be used in event plans. Objects added to the client collection are available to all team members. New objects are added weekly by the Visrez team based on client requests.
Clicking the + beside the object in the Visrez Library will add it to your collection. To remove an object from the collection or archived if already used in a plan you simple do the opposite and un-check the object. Clicking the + beside the object in the Visrez Library will add it to your collection. To remove an object from the collection or archived if already used in a plan you simple do the opposite and un-check the object.
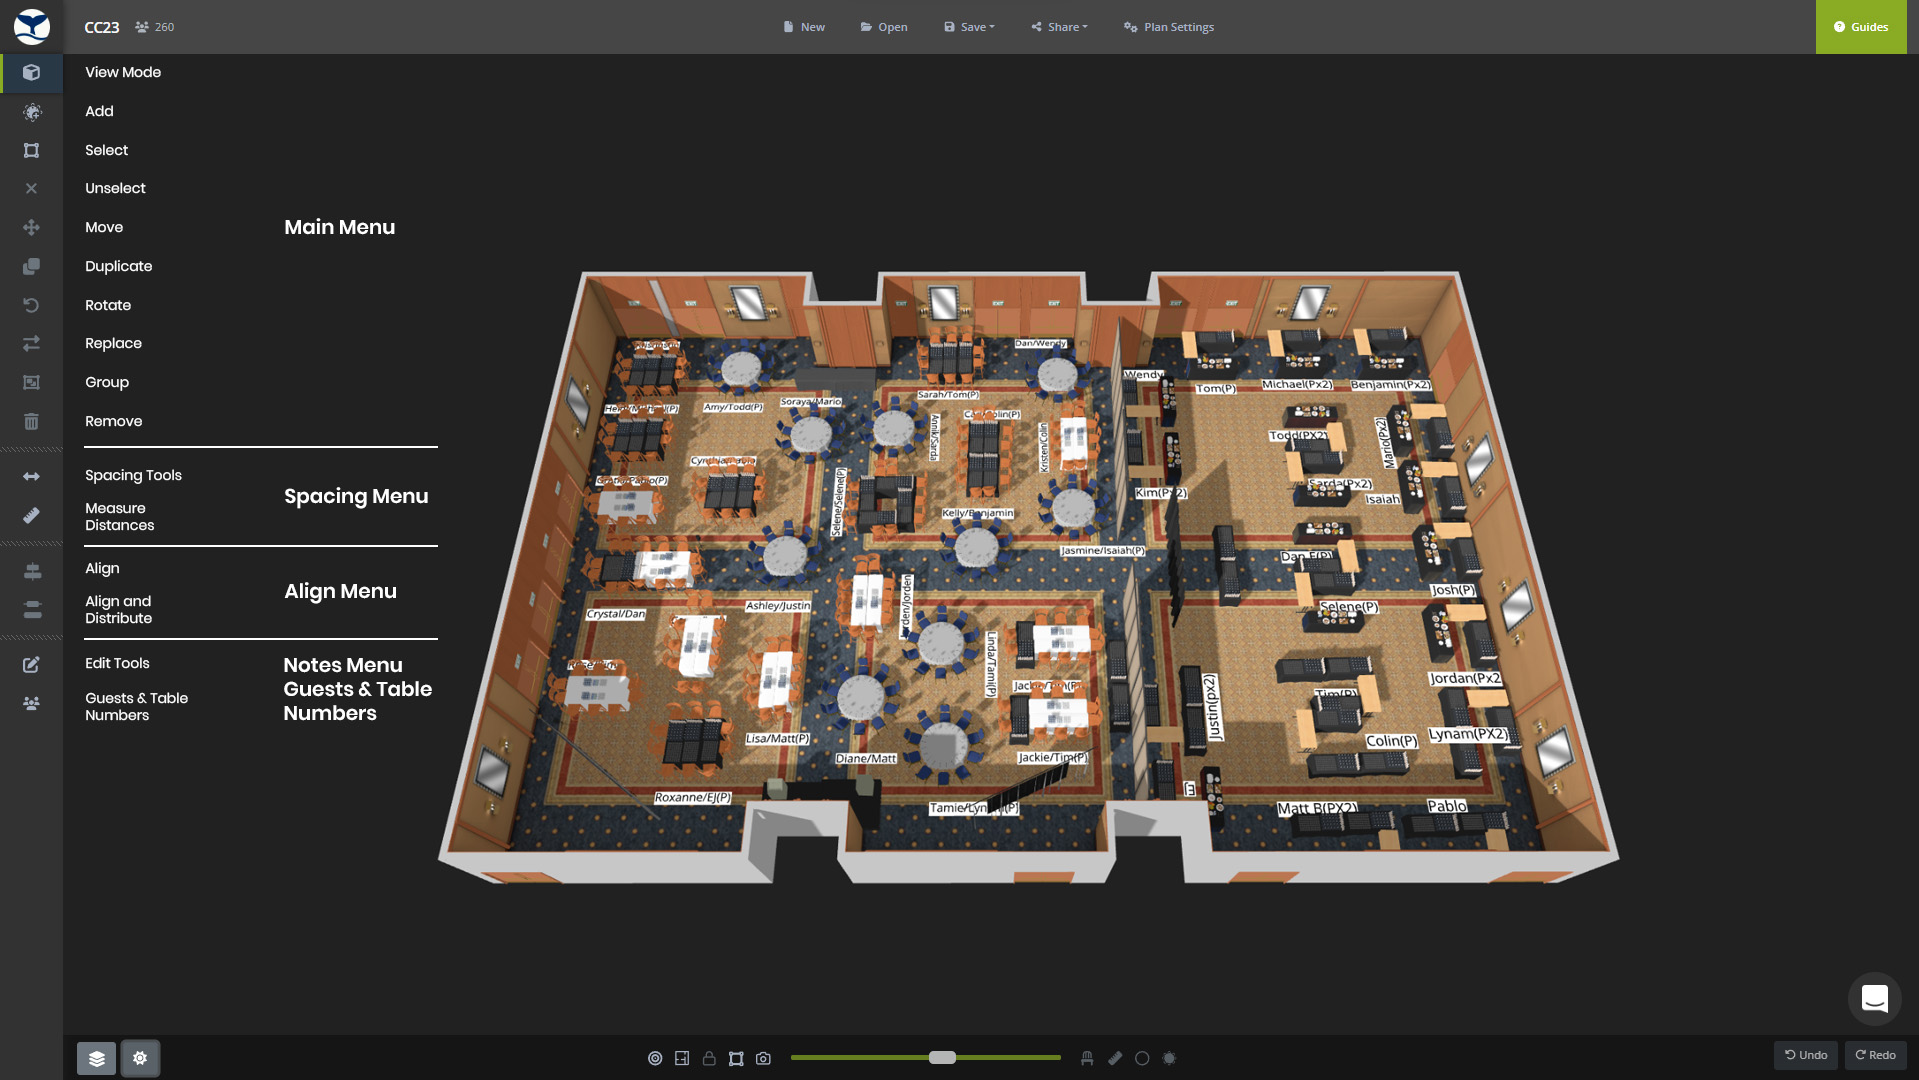
In the Main Menu the Add button (A) opens categories with objects which have been added in the client collection. The objects with different size and seating are selected from the dropdown menu and color options from the carousel slider.

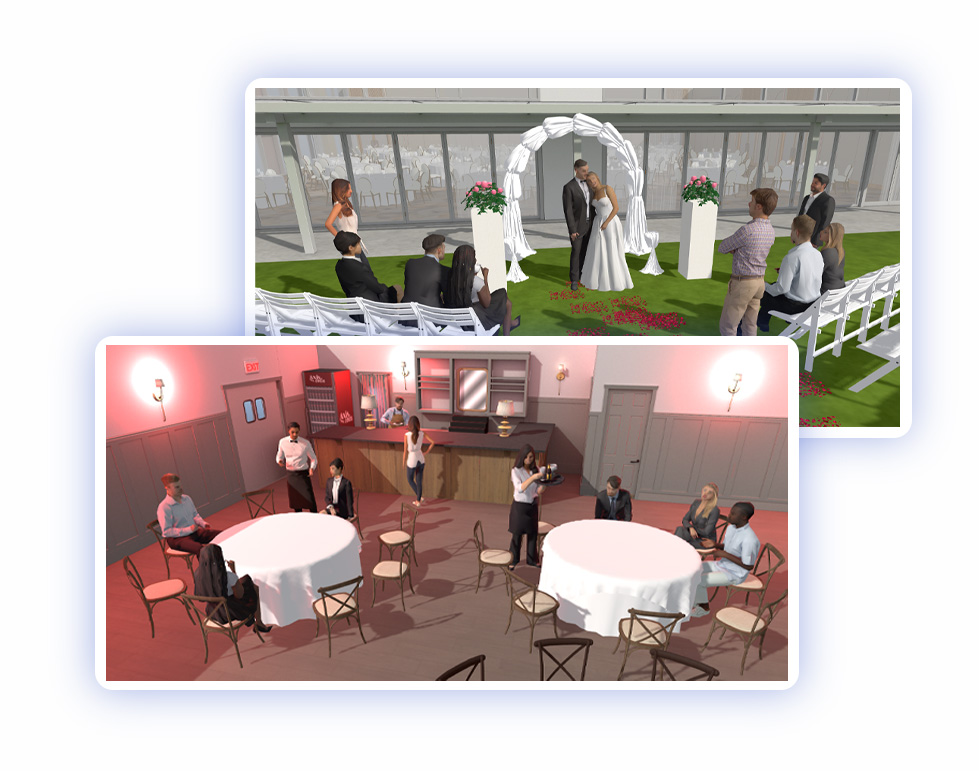
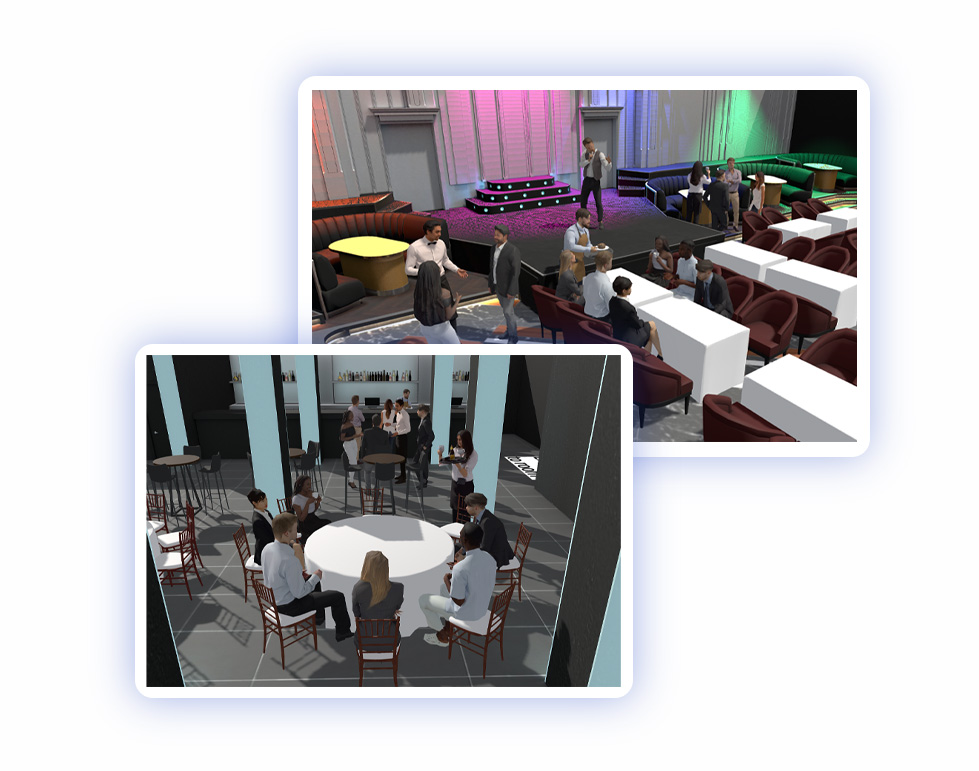
Adding human models to plans has been something our team have wanted to do for a long time but we couldn’t find a way to create realistic human models without dramatically increasing the file size of event plans. We now have a library of super realistic human characters which can be added just like furniture without slowing down the loading speed of a plan. This makes Visrez more fun than ever as users have a cast of characters to choose from depending on the type of event plan you are creating. Human models can be added individually or in groups to understand room capacities and occupancy dynamics and can help to show your clients how many people could fit inside any space.
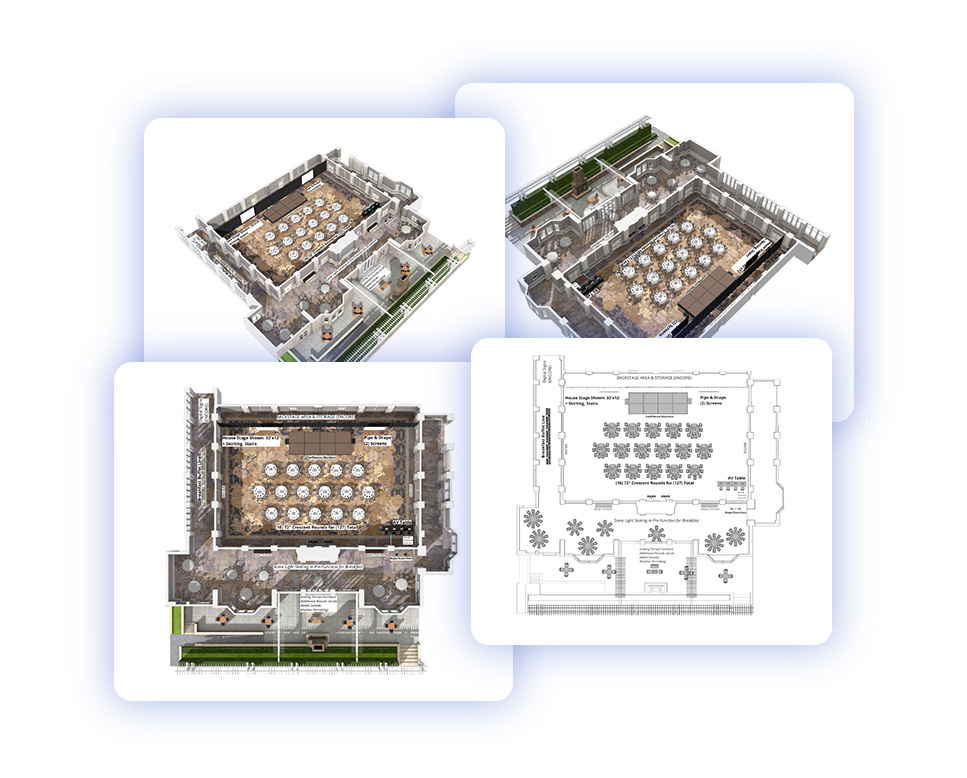
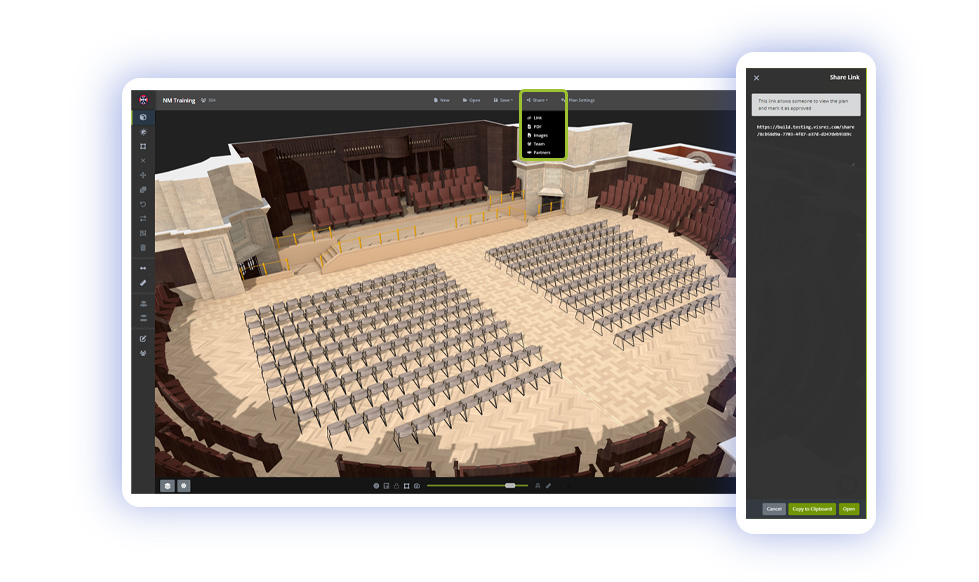
Visrez allows users to export plans in multiple formats including Interactive Shared Links, PDFs and PNG images. Plans can be exported in 3D with multiple views, 2D or black and white schematic format. You can include notes, equipment , table numbers, dimensions and other information. PDFs have a range of views and elements which can be added to all PDF exports. Floor Plan Builder exports all come with a built in link to the shared plan so all your client needs to do is click to load the interactive version. Any changes made in the editor appear immediately in the shared version so if you update the plan you don’t need to share a new link, the client just refreshes to see the latest version.
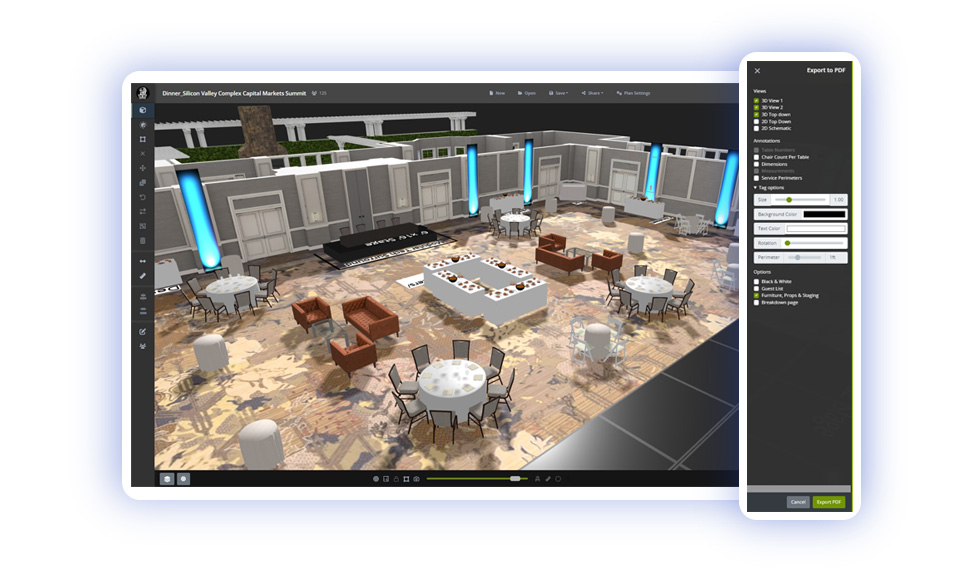
Visrez gives you the formats you need to communicate effectively to all stakeholders. Plans can be exported in full color 3D or 2D Black and White in the same PDF. From a sales perspective the 3D version is more impressive but many operations teams prefer to work from black and white format. All view types exported in a PDF will link to the interactive plan by clicking on the diagram.
Users can export a breakdown of all the furniture used in the event set up along with a thumbnail image in a separate table. This breakdown can be included in your PDF export or on its own as a separate PDF. This is a really useful way to provide both the client and the operations team with a summary of all the furniture and staging props required in any event plan. This information can be used like a checklist for the set-up team to make sure they have all the necessary elements in place for the event.
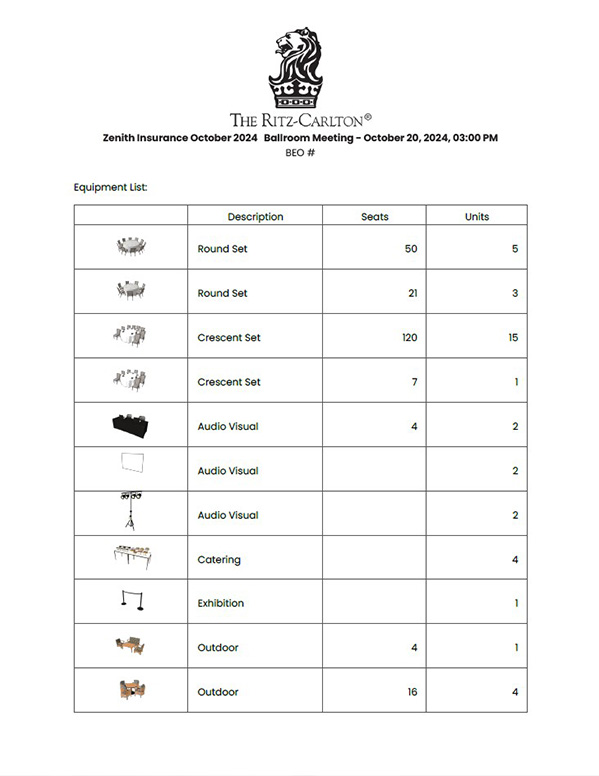
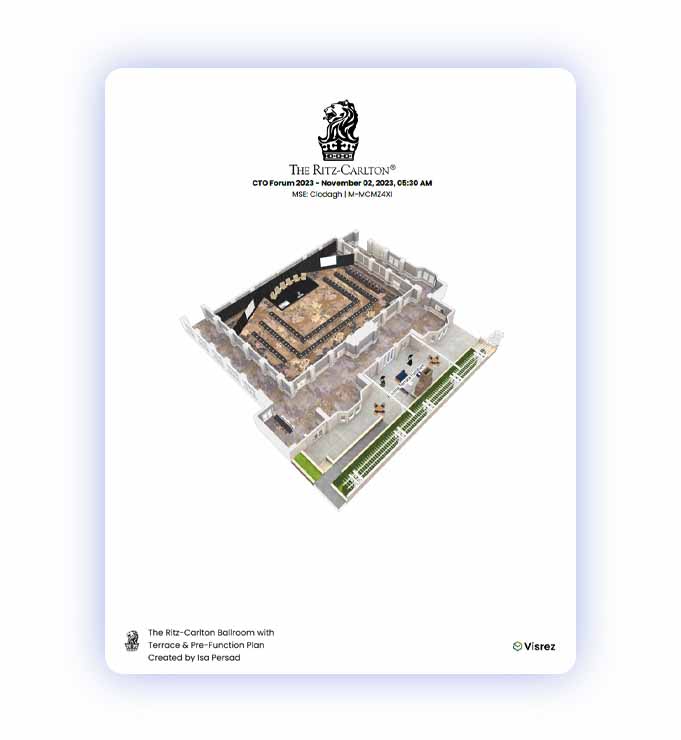
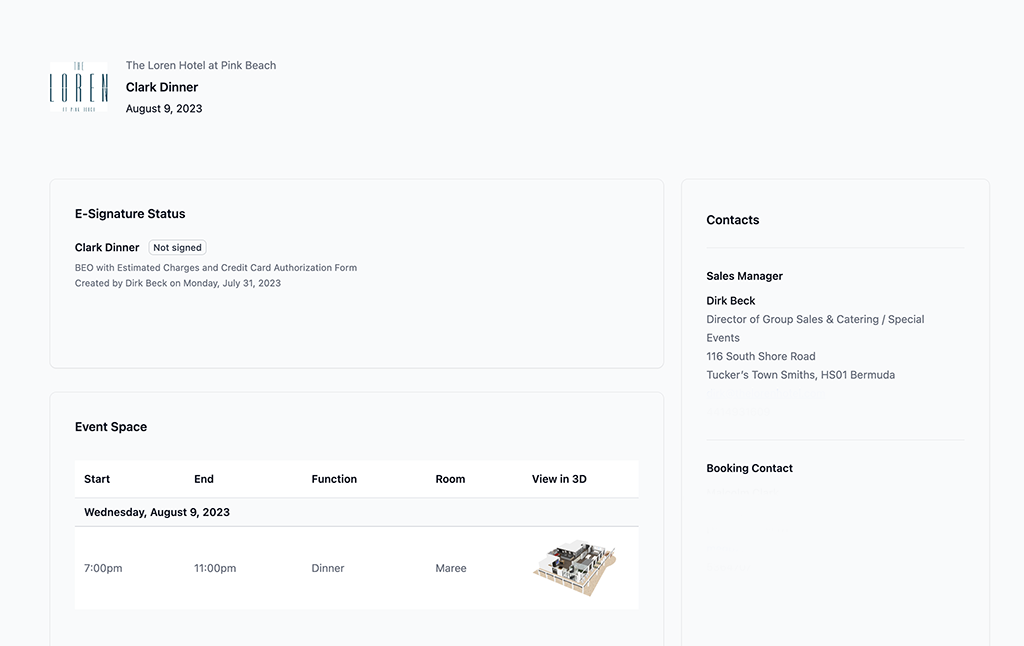
Additional event information such as Date, Time, BEO , Notes can be added to the PDF under the plan settings. This is displayed below the client logo at the top of the PDF exports providing a reference to the BEO or Client details in the PDF distributed to the team. The Plan settings also marks if a plan has been client approved.
The Shared Link allows your client to view, approve or request edit access to any builder plan. This is the fastest way to share an event plan with a client or partner. Shared links update in real time so if you make a change to your plan all your client has to do is refresh to get the most up to date version. You do not need to resend a new link any changes to the plans update in real time.
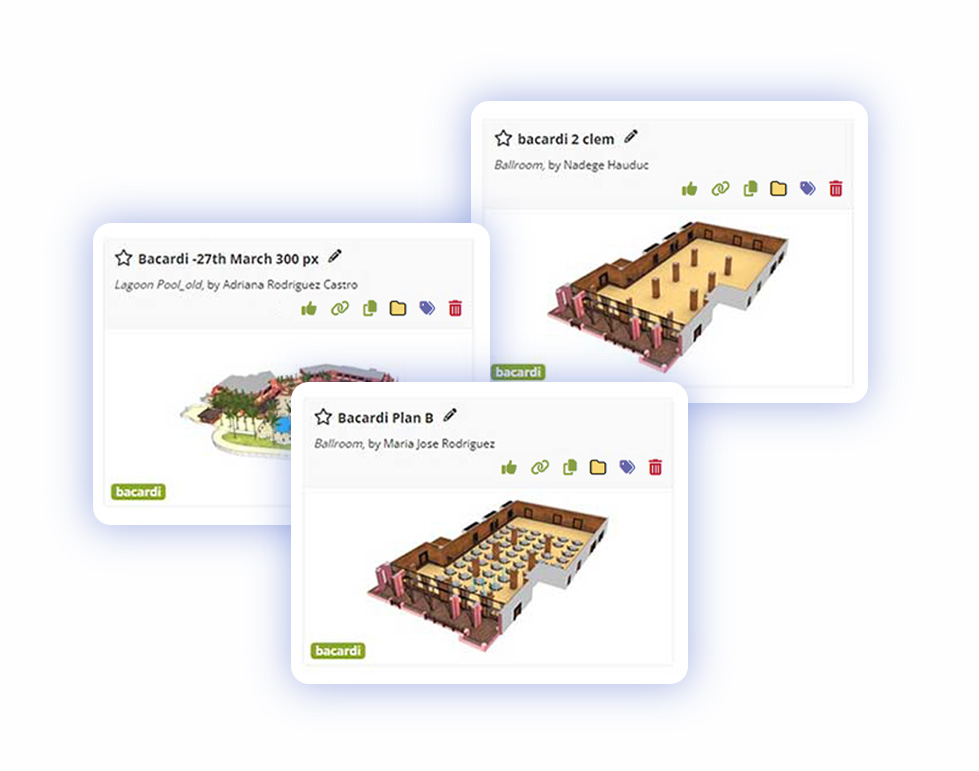
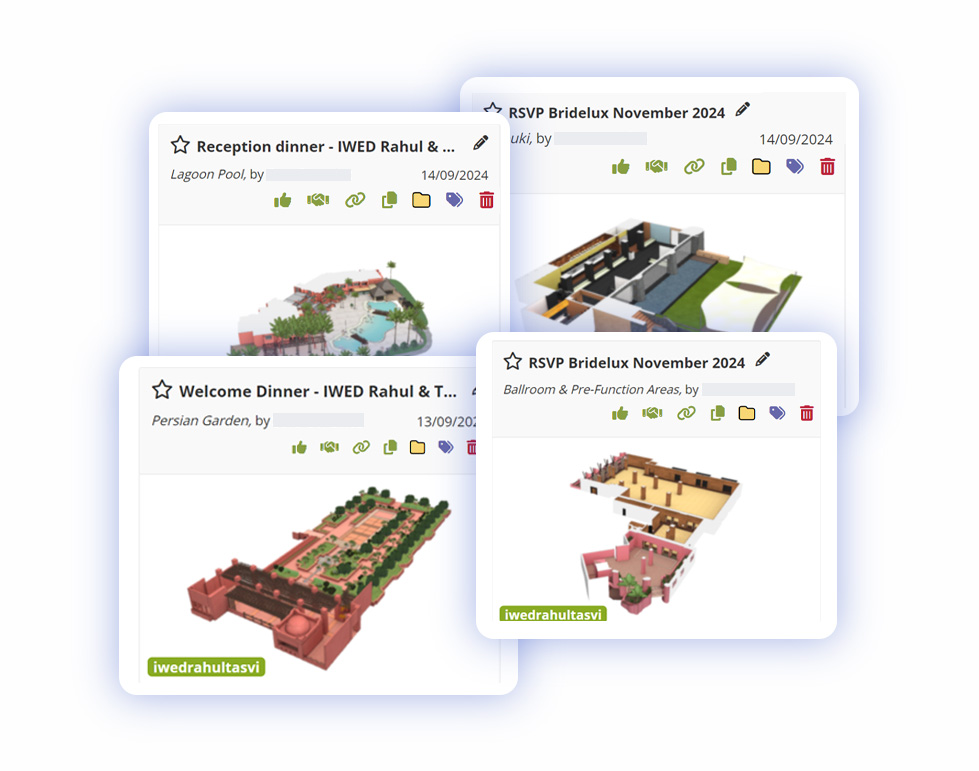
Tags are displayed on the plans page and you can filter all tags in the dropdown controls at the top of the page. Tags are a great way to organize plans by respective client names rather than creating sub-folders within your account you simply tag the plan with the client name and then you can filter plans by that tag.
Users can invite other team members to collaborate on the same plan within their accounts by using the Share > Team option. This allows multiple users in the same team to work together on any event plan once they are invited by the plan creator. Users can still copy another user’s event plan but if you need to work with colleagues on the same event plan its best to share to other members the plan. To do this click on Share > Team and select the users from the right sidebar to invite them to the plan. When a plan is shared amongst team members an icon is displayed on the /plans page to indicate it is shared amongst team members.
Visrez generates a URL for the tag so you can send a link to your client which displays all the plans tagged for their event. Plans can be shared outside Visrez without the user needing to have an account. So if a client is considering multiple spaces you can share a page outside your account with all the plans in all spaces.
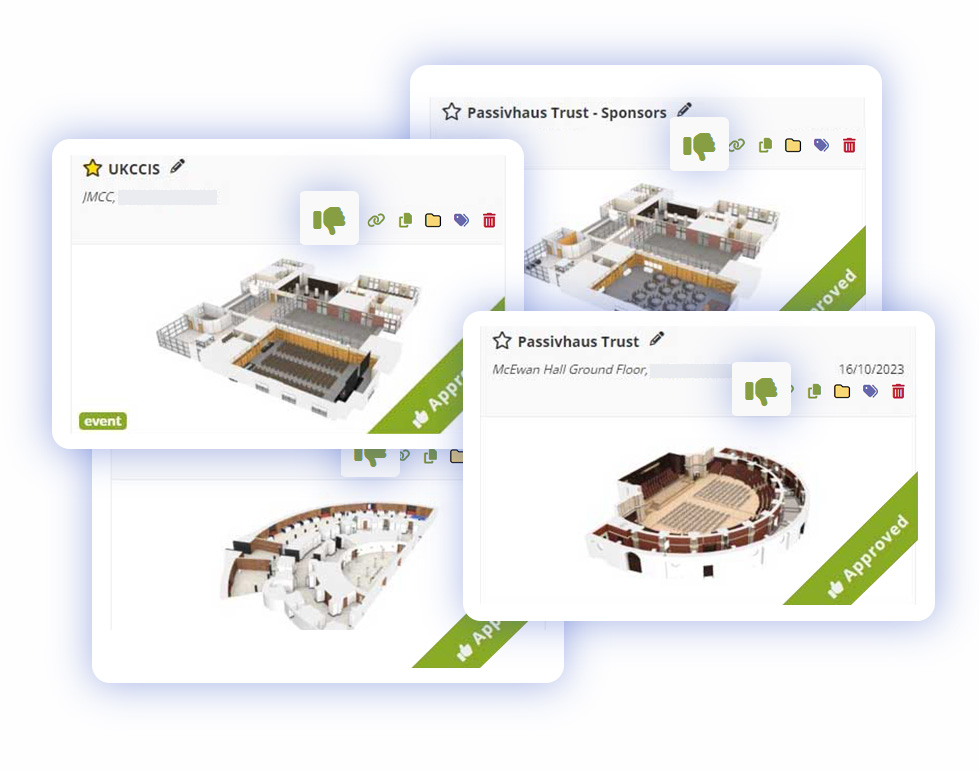
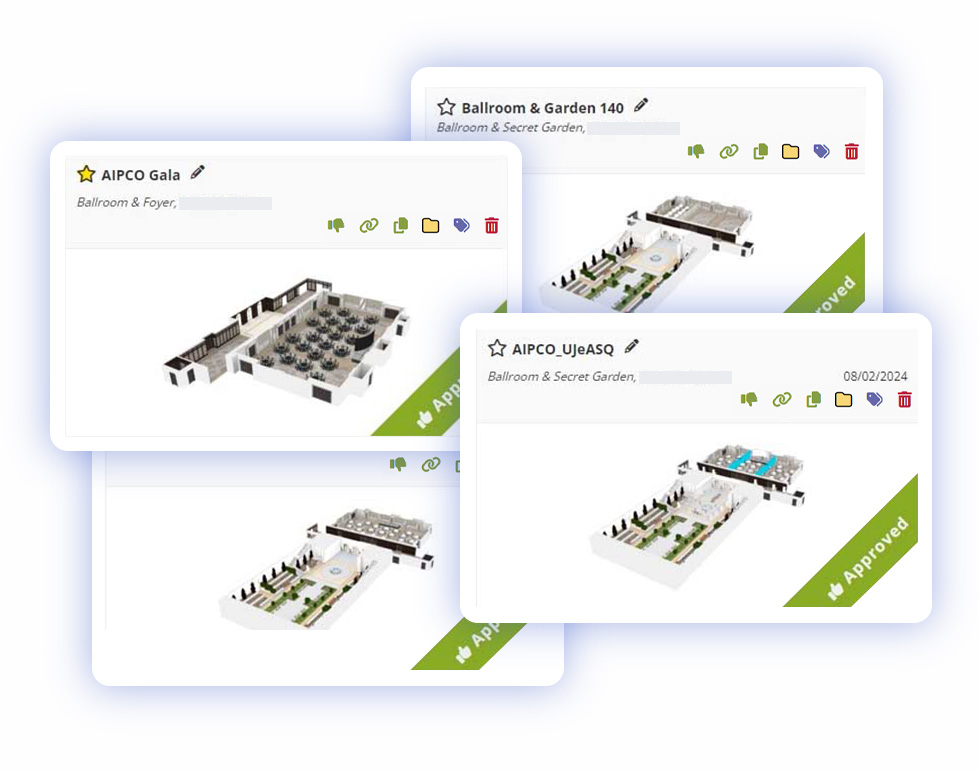
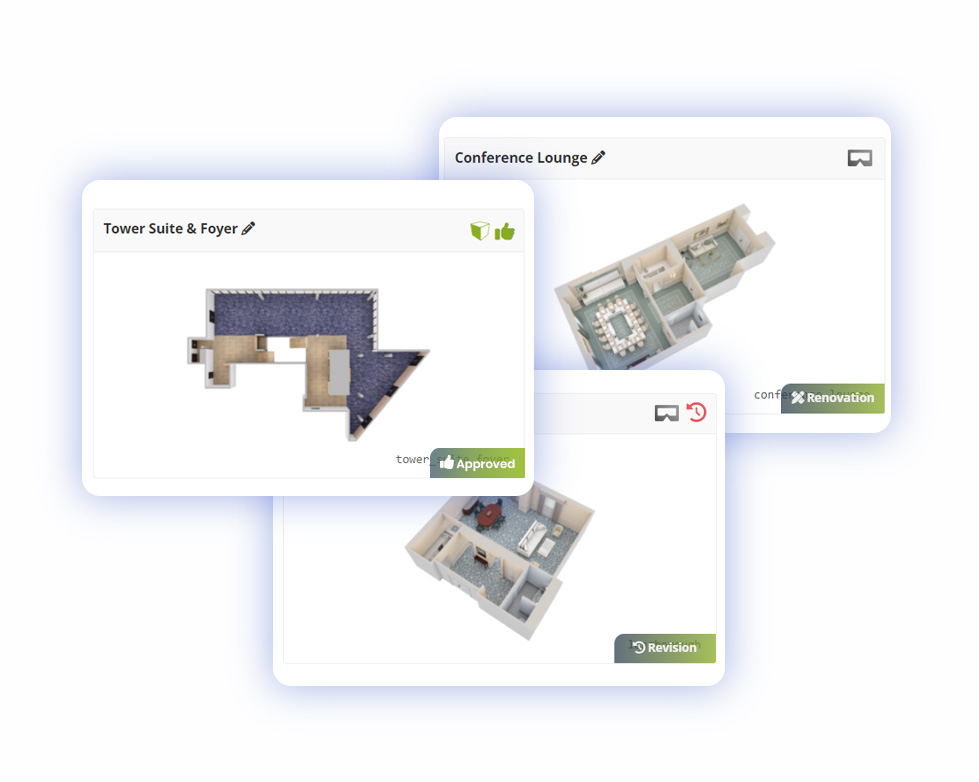
Getting client approval is vital to ensure the smooth set-up of an event and Visrez comes with a built-in approval feature where clients can formally accept their event plan on the shared link. Once a plan has been approved, both owner of the plan and client are notified by email and the plan is marked in your account.
Revoke approval
Approvals can be revoked from the plan controls.
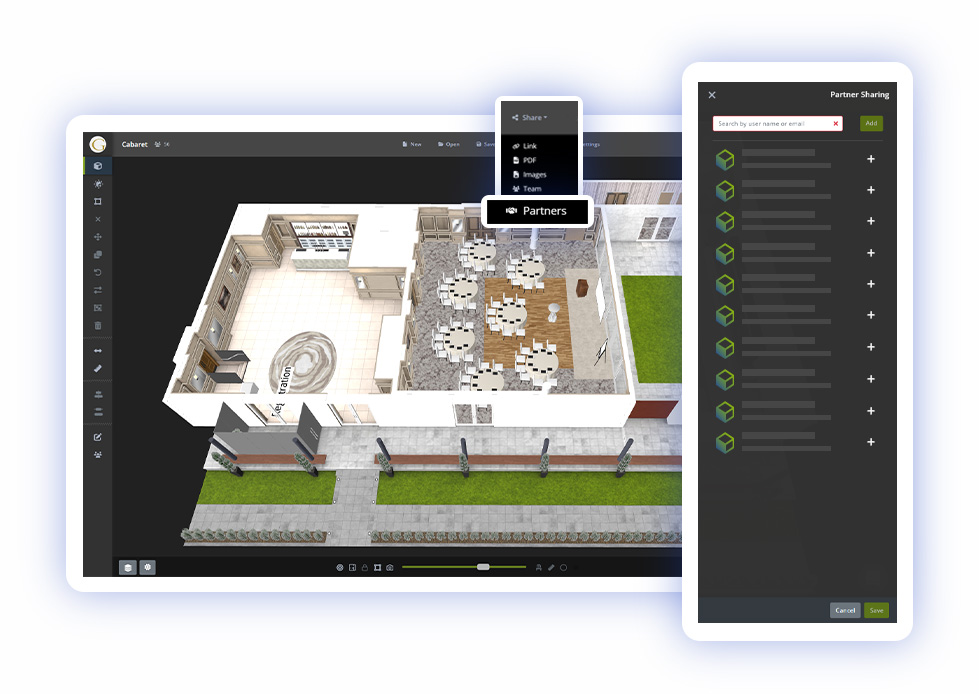
Event planners and outside partners can be invited to your team’s Visrez account to edit plans which have been shared with them. This allows your team to collaborate with outside event planners and third party suppliers on any Floor Plan Builder diagram. Partners can be invited to plans by any team member and once the partner has registered their account they have access only to the plans shared with them.
Partners do not have access to the Visrez library or any other areas of your team account. Planners & Partners cannot select furniture or objects from the Visrez library but can use the client collection.
To invite an event planner or third partner to your plan select the Share > Partner option from the Share menu in the top of your builder.
Clicking on the Share > Partner option will display a list of the registered partners who can be invite to collaborate on the event plan.
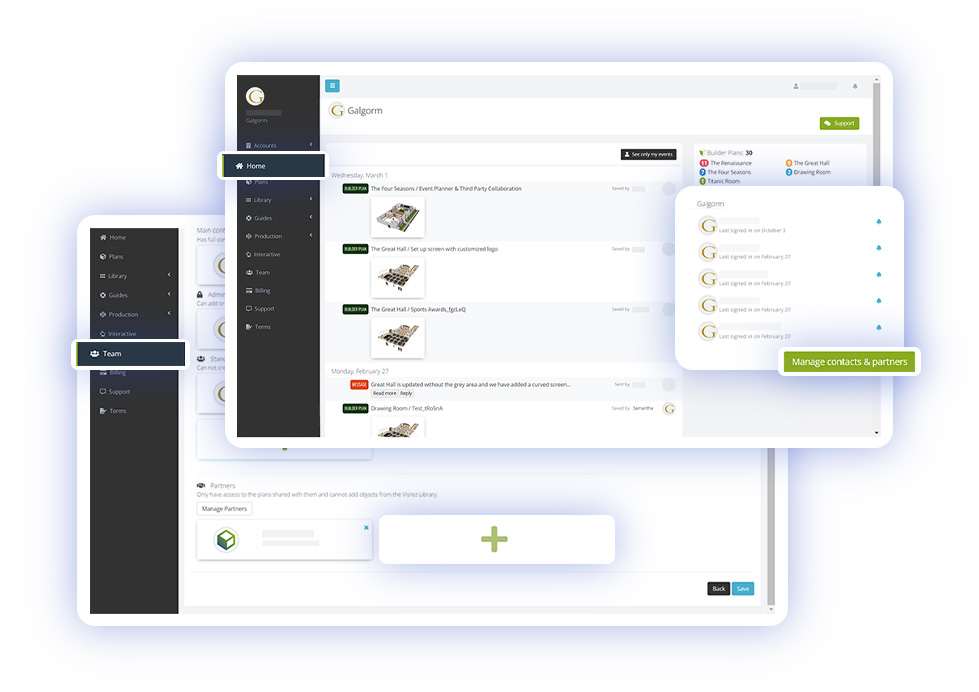
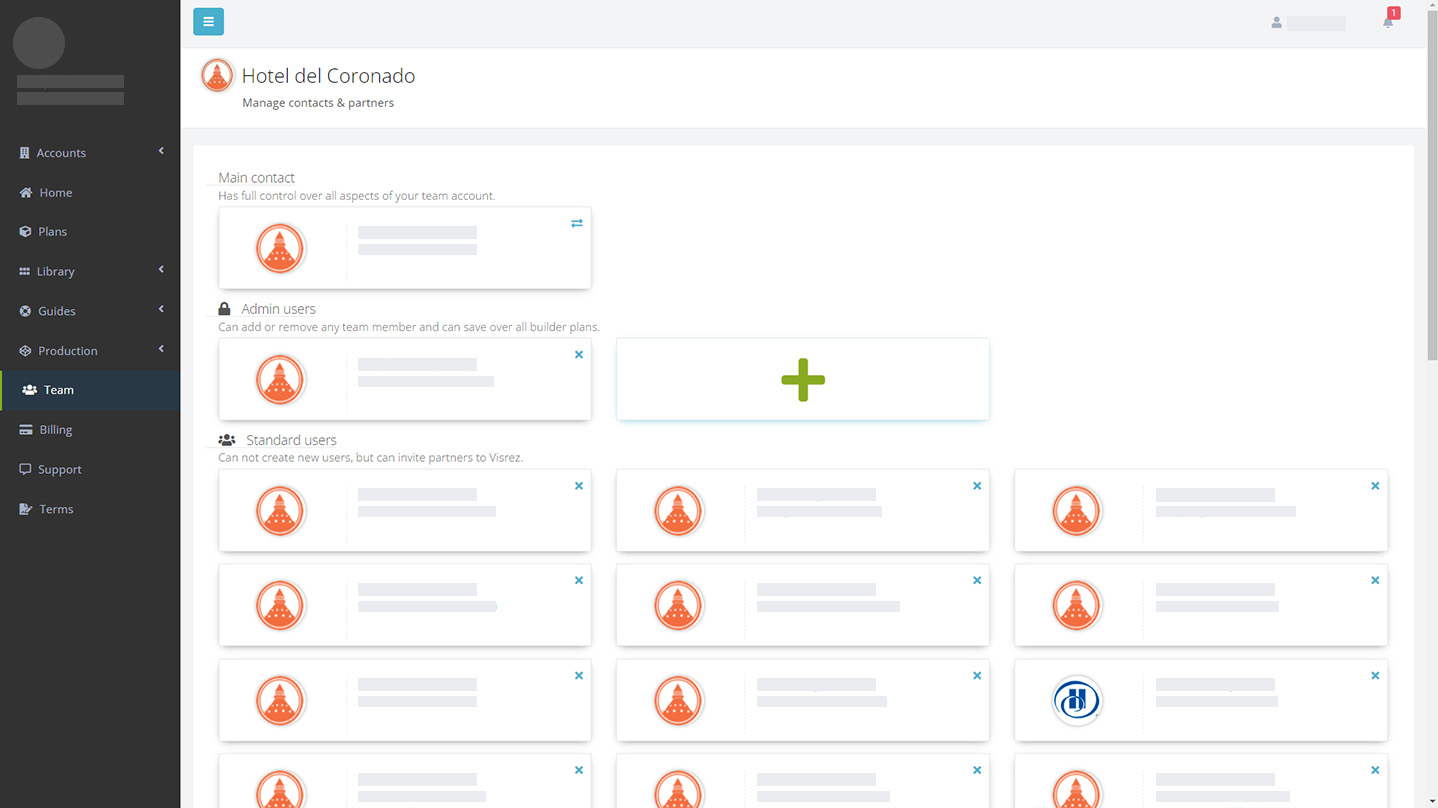
Partners have to be registered on your Team account before they can be invited to collaborate on any builder plans. All users can invite partners to event plans by clicking on the Manage contacts & partners in lower right hand side of the homepage. To add a partner to your Team’s Visrez account just Click on the Plus + and enter in the Partner’s email address and save.
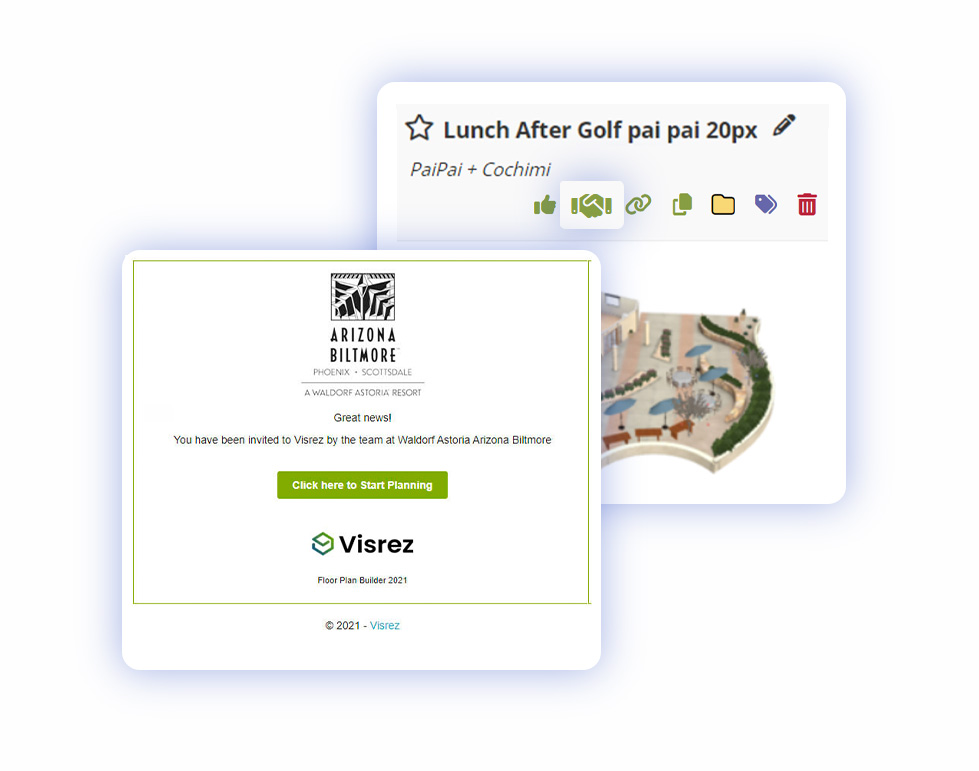
Partners receive an email notification displaying the branding of the property they have been invited to. Once they have registered on Visrez they see a /plans page displaying all the diagrams shared with them by the on-property contact. Planner accounts can include event plans across more than one property if they work with other venues which use Visrez and have been invited to those accounts. When an event plan is shared with a partner a new icon is displayed on the /plans page so you can tell it is shared outside the team.
There are many ways to add stages to your event floor plans in the Builder. You can drop in a specific stage size from the Visrez library or create custom stages to any size using the Builder tools. It is fun to watch a stage being created to scale inside your 3D event plan. Select the stage object from the Library and choose between adding a specific number or Build Stages & Platforms options.
There are a few ways to add dancefloors to your event floor plans in the Builder. You can drop in a specific dancefloor straight from the Visrez library or create a custom size using the Builder. The build option allows you to drag your mouse to the size you need and the dancefloor gets built automatically. Both options are shown in the animation and you can see how easy it is to create dancefloors of any size.
To drop screens into the space from the ceiling you can use the Truss Rigging feature which allows you to hang horizontal trusses at variable heights over your space and hang screens (or lights) from those. This is done using the suspend to ceiling feature and the Move tool when active with + / – Hotkeys to increase or decrease the height. The initial height is parallel to the top of the walls for an indoor space or at the height of the tallest object in outdoor spaces.
The text tool is located at the bottom of the main menu which allows you to add notes onto your plans. This is a great way to mark up plans before sharing with clients for feedback and approval. To add notes write the notes in the text box and click on any point or object on the floor plan. Font, color and size can be adjusted in the sidebar along with the text box background to ensure it clearly stands out against the floor texture. Text can be placed on top of objects such as tables, stages and dancefloors.
Just click on the model and drag the arrow or Circles & Square options to save it onto the floor plan. This is a great way to indicate large event spaces and the drawings are displayed in PDF exports. Directional arrows allow you to indicate the flow of traffic in an event diagram to differentiate between entry and exits.
Sharing a 3D event plan featuring their logo on screen guarantees a great first impression and will help your venue stand head and shoulders above the competition. In the Audio Visual category of the Visrez library, you will notice the screens display an icon beside the + or check mark. This icon indicates that this object allows users to upload a logo for your plans. Once the editable object has been added to your collection you will see that the image icon is blue to indicate that you can upload a logo to your library and then select that logo from inside your builder.
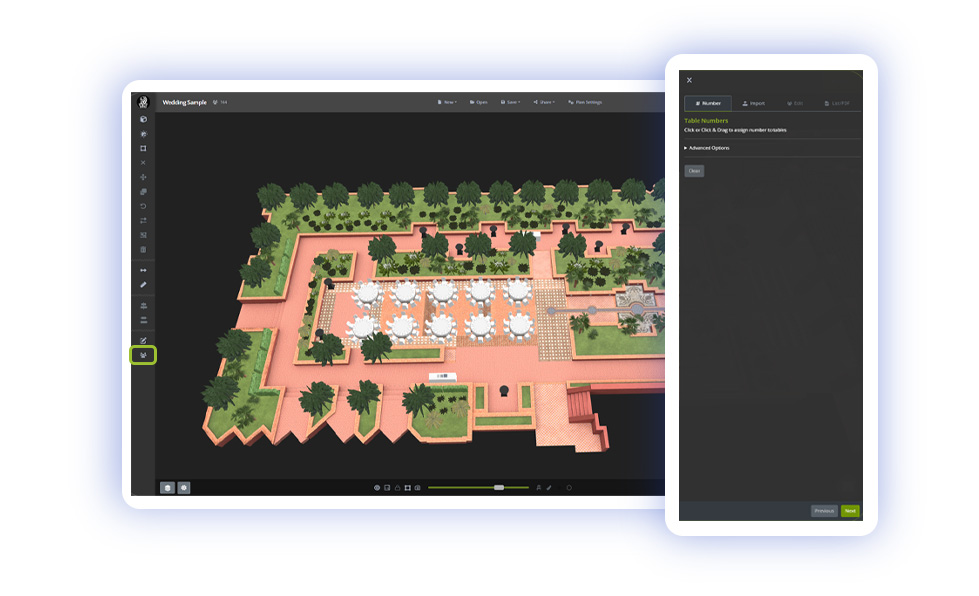
The first step is to draw on table numbers and save them in your plan. This can be done by either clicking on the tables one at a time or by clicking the left mouse button and drawing a path over the tables. Numbers must be saved before you can upload your list so once you are happy with the order click save.
Table Numbers can be rotated or styled to fit any room orientation.
Share > PDF Export Settings > Show Table Numbers > Tag Options.
Guest Lists can be added by either uploading a CSV file or by entering guests manually on a table-per-table basis. Importing a CSV file is a lot faster than entering the names one by one so we recommend this option. The guest list tool is only activated when tables have been saved to your event plan.
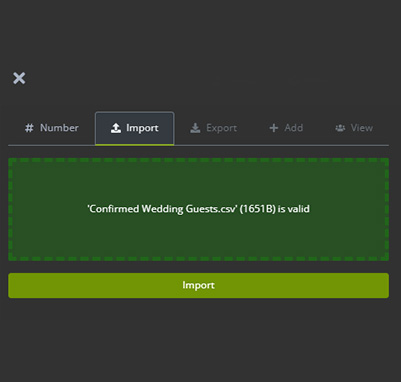
The quickest way to populate a guest list is to import from a CSV file. After table numbers have been saved you can then import a CSV file by dragging it from your computer or by clicking within the import area.
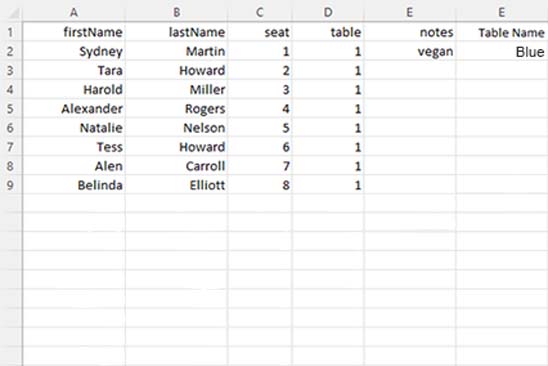
CSV files should be formatted as follows
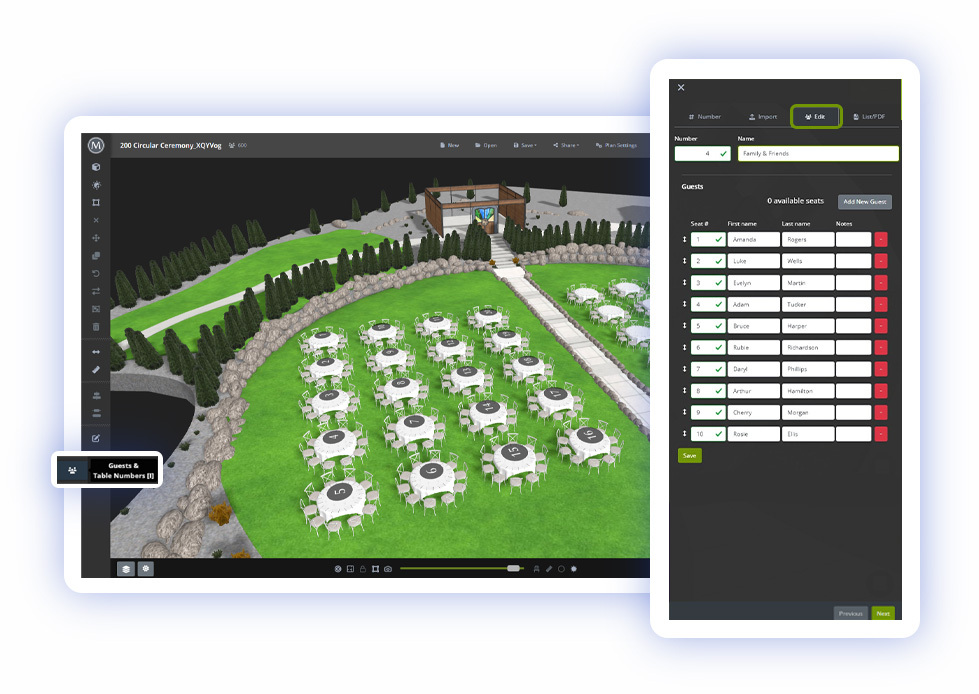
Guests can also be added on a per-table basis by clicking the table and selecting the guests’ tool in the left side menu. Using the Add tool you can then manually enter guest names, and table names for each table in your plan. Once guests have been imported, all names in the plan are listed under the View tab.
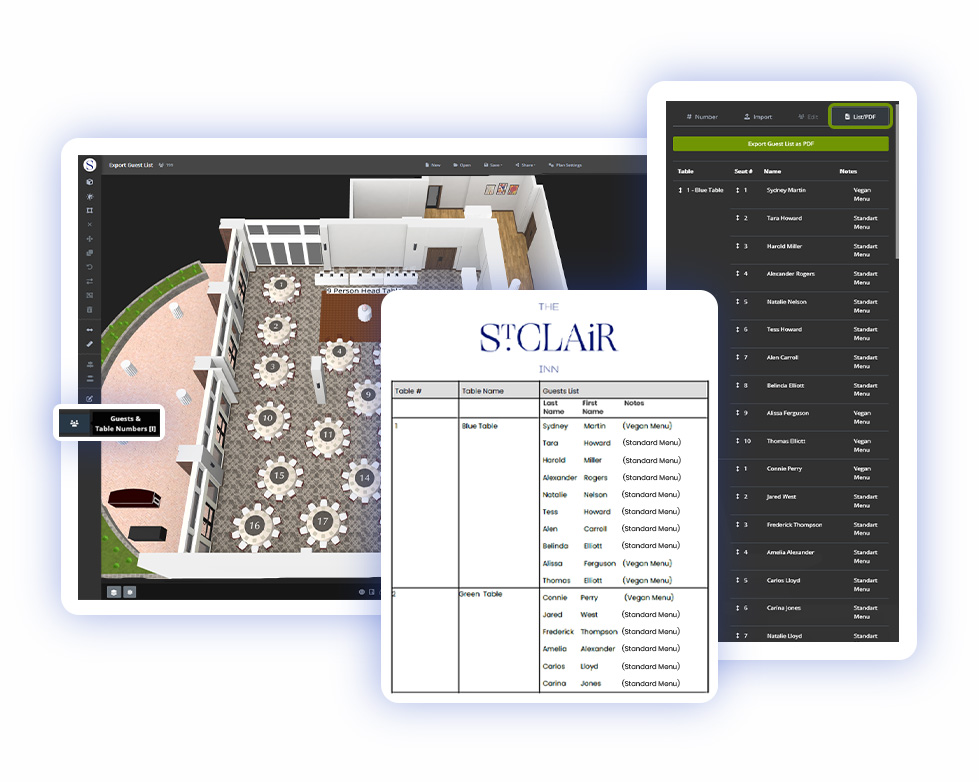
Guest lists can be exported as a PDF under the Share > Export option
Guest lists can be exported with the event plans or as a PDF from the share settings.
If you have created a plan in one space and would like to see how it looks in another space you do not need to remake the plan as you can copy and paste from one space to another.
In your Event Plan – CTRL & A (to select everything) and CTRL & C (to copy)
Open the new event space from the Plans Page (An empty space) CTRL & V to paste into that space.
All spaces have different dimensions so will need to adjust to fit using the Move and Rotate Tools.
Capacity charts can now be converted into 3D Event plans with one go. Users can generate 3D event plans for every space and set-up style just by uploading a CSV file to their account or by entering in the desired setups and capacities. Automating the creation of 3D Event plans is a massive timesaver for sales, catering and operations teams as they now have the ability to quickly generate an unlimited number of 3D Plans from a single CSV upload for each space.
Not an everyday feature but a very nice option to impress your client by adding coloured lights onto screens, backdrops or walls to create some genuine atmosphere in your event plans. It is easy to do once you have selected the right objects from the library and these can be placed on the ground to hung from a truss depending on the plan.
With Atmospheric Lights, your plans become even more realistic, bringing them to life and creating a genuine atmosphere for your event.
Visrez requires dimensions along with reference images.
Professional photoshoots are not necessary.
Reference photos can be taken with a phone.
Event spaces do not need to be set-up.
Capture photos from each corner of indoor or outdoor spaces.
Existing photos, virtual tours & videos can be included.
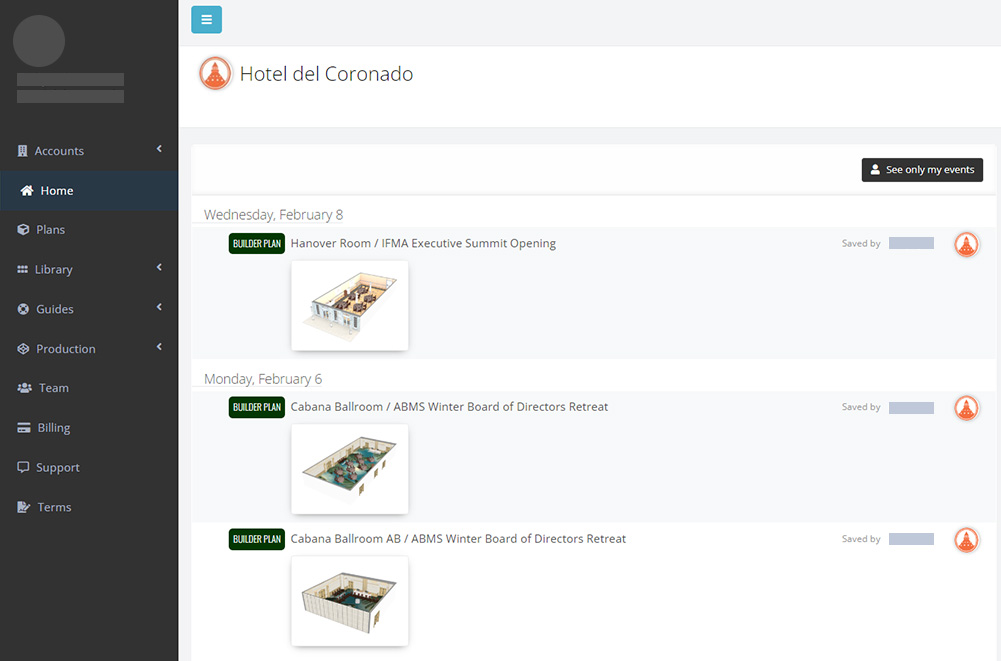
On the dashboard you will see a chronological history of all the activity in your Visrez account from the beginning. As plans are saved they appear in the timeline and can be opened directly from there. From here you can access all the products which are activated in your account using the menu on the left hand side.
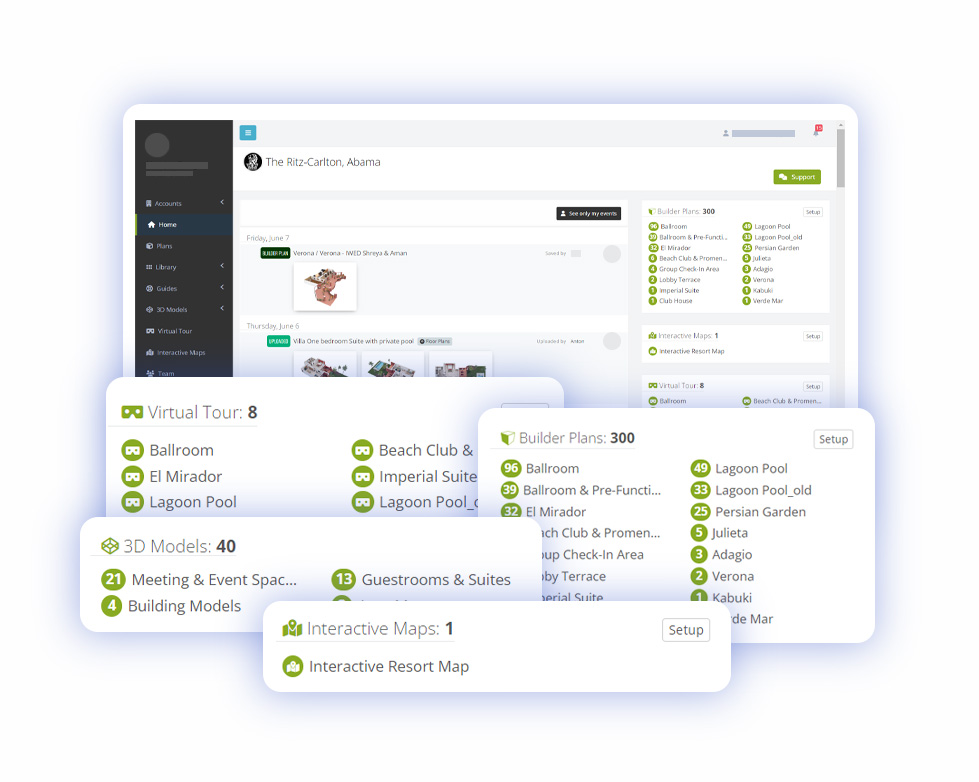
The plans box displays a breakdown of the plans per event space. The top bar displays the total number of plans created across all spaces. Clicking on any space loads the plans page.
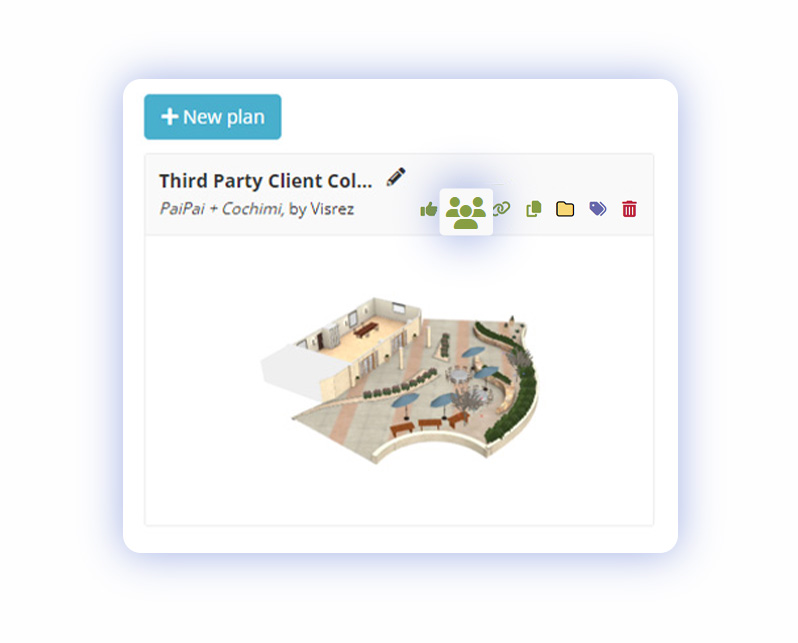
On the plans page have a number of controls available before you open an event plan in the builder

Edit Plan Name: The owner of a plan can rename it by clicking the pencil and then hitting enter.
Delete Plan
The Admin Contact on each Visrez account can delete or rename plans created by all other users.
Create a Copy
You can create a copy of any other user’s plan by clicking on the duplicate button below the event date.
Users can copy plans created by other team members and can rename or delete only their own plans.
Edit Tags
With tags, you can share a unique URL with your client showing all the plans across multiple spaces.
So if a group is using multiple spaces you can create a tag for that group and share a page featuring all their plans outside of your Visrez account. The remove tag option is located next to the tag name.
Share Link
From the shared page the user can open any of the event plans and if they have been set up as a partner they are able to edit any of their plans. Remember anyone with access to the Shared Page Shortcut will be able to view the plans but only partners can edit plans.
Approve Event Plans
Once a plan has been approved it is marked with a green icon on the /plans page so it is clear to the team.
The admin users on your team can manage all aspects of the Visrez account. There are no restrictions to the number of users you can have in your team account but only admins can delete users from Visrez. Visrez accounts can have multiple admin level users. To add a new user to your account just enter their email address and they will receive an email signup immediately.
To stop Visrez emails from going to spam, you need to whitelist the sender orders@visrez.com in your email client (Gmail, Outlook, etc.) by adding it to your safe senders list , ensuring emails land in your inbox instead of junk.
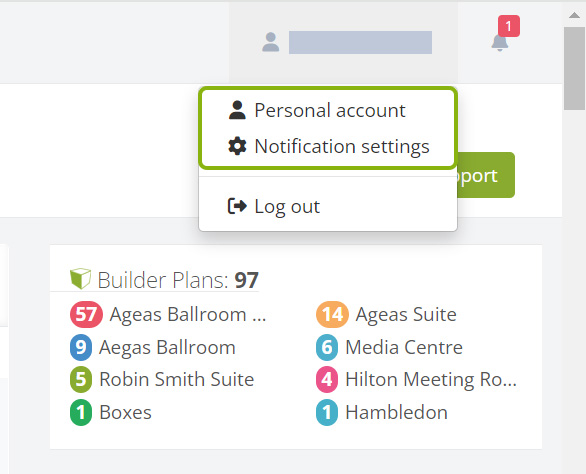
Users can update their profile in the top right-hand corner and disable system notifications. This includes the weekly asset reminder emails which are automatically sent during production when assets are outstanding. It also includes the weekly usage reports for embedded files which are displayed in client sites. If you no longer wish to receive these emails you can disable them in your account here.
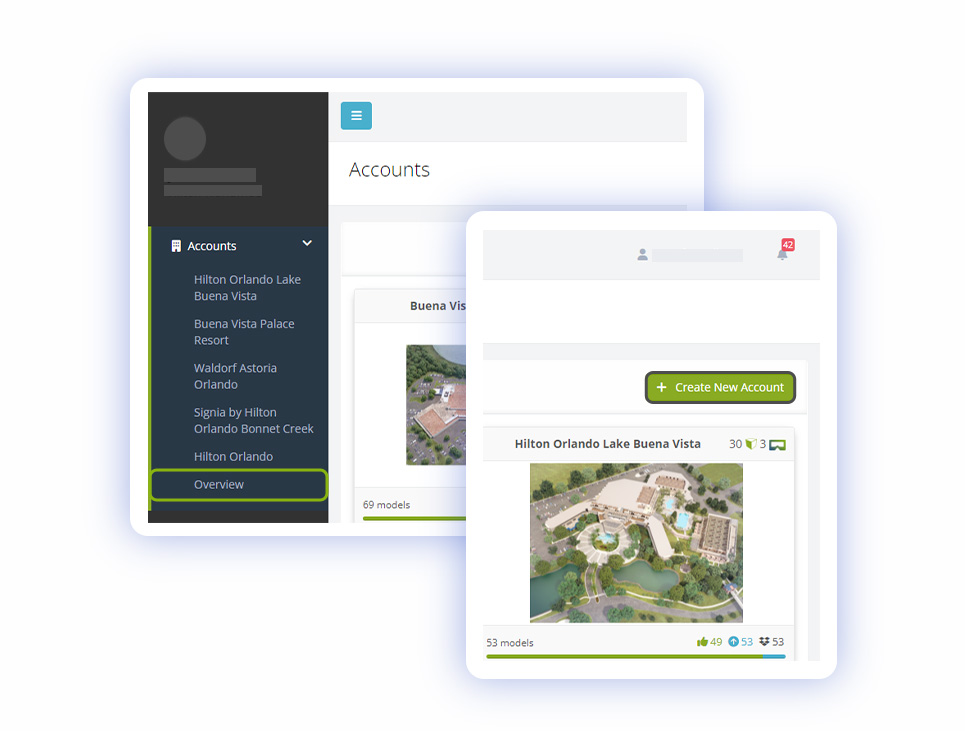
The Overview menu shows list of all accounts. To add a new account use the Create New Account button. Details for the account can be entered – Description, Permalink, Brand and Country.
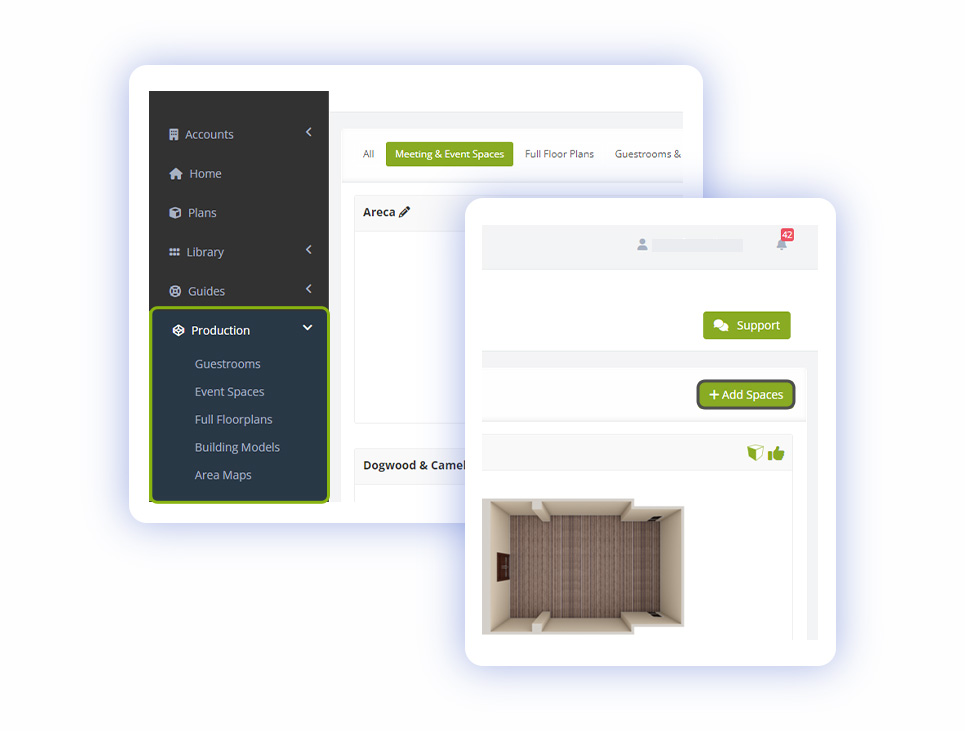
All categories can be listed from the Production menu. Spaces can be added from the Add Spaces button.
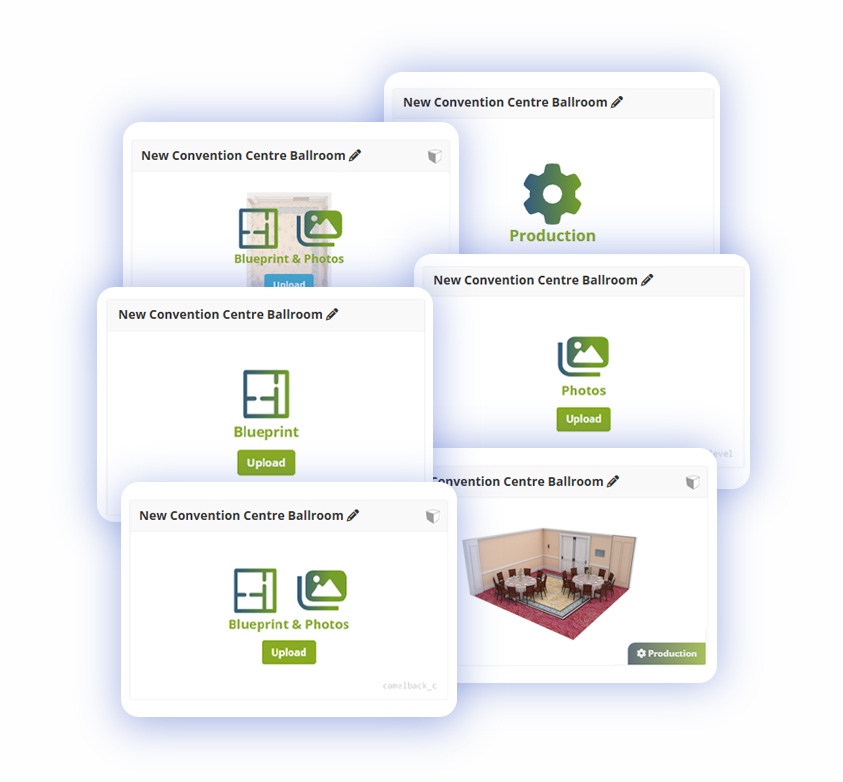
All assets can be uploaded from the Home menu in your account. Choose the Upload button then drag and drop or select photos to upload. Virtual links and dimensions will help to create a more realistic space.
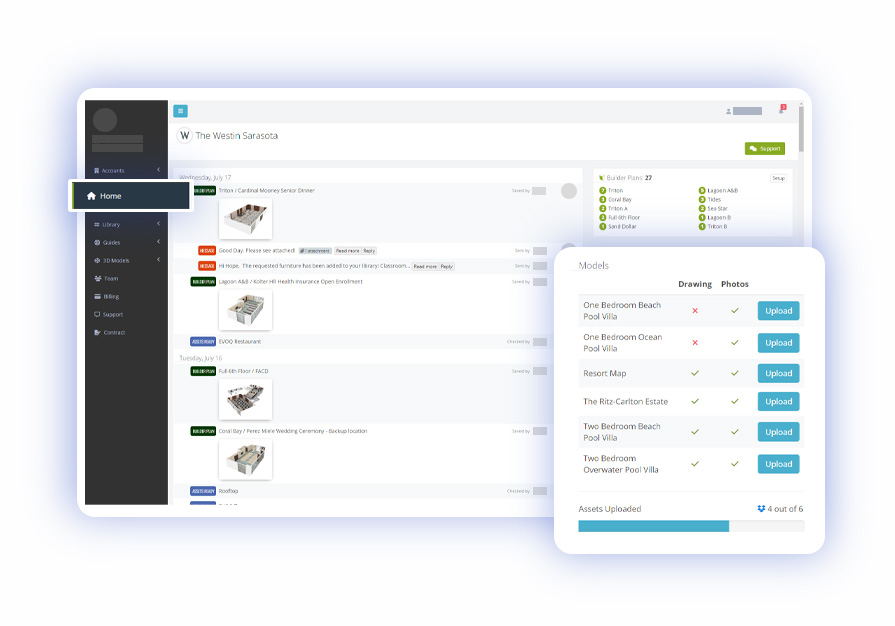
If there are missing Photos or Diagrams in the 3D Models menu will be displayed what exactly is needed and an email will be send. Click on the Upload button to add more assets.
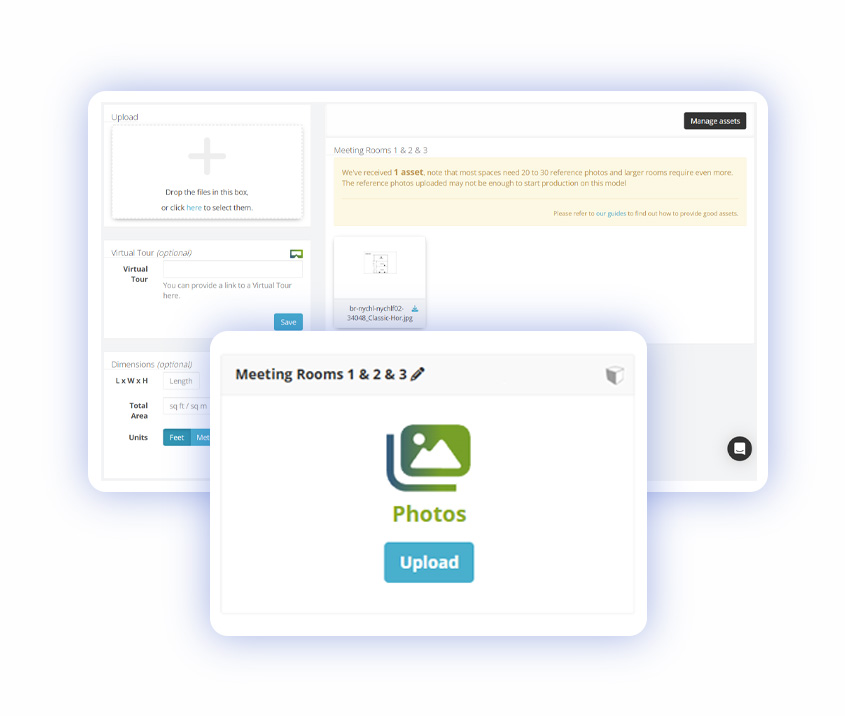
Once everything is uploaded production process will start.
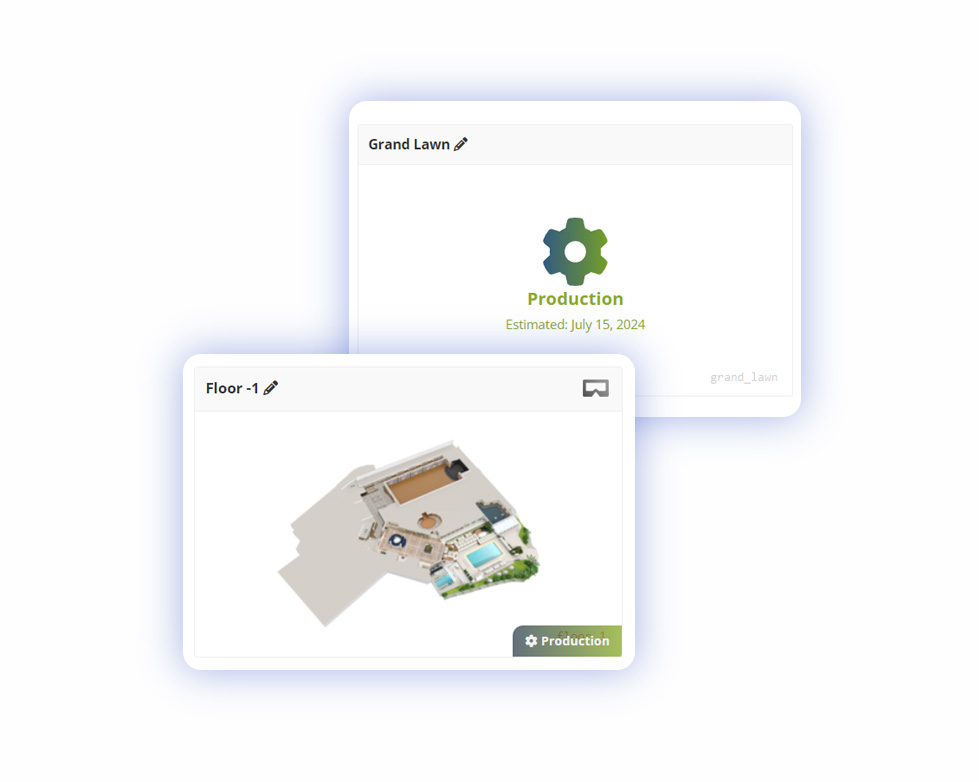
When a model is ready you can approve or send it for revision and renovation.
If a space can be subdivided multiple times using airwalls these are not counted as new spaces. It doesn't matter how many dividing walls in the space, you pay for just one space regardless of the dimensions or details. Visrez has generated photorealistic 3D Models of thousands of events spaces worldwide, so no interior is a problem for our team to recreate.
We includes lobbies, foyers, terraces, patios, lawns and connected spaces as part of the model however full floors are not considered single spaces. Whilst it is not an exact science, we are reasonable and do our best to provide great value for money as our clients will attest.
Yes, we provide the subdivided spaces within the same fee so if you want to create plans in Section A, B, C or D individually you can do so at no additional cost as you will have the separate builder models.
Absolutely, you can add new spaces at any time. Many of our clients started with a single space and added more as they saw the results of sharing Visrez plans with their clients.
If the exact furniture does not exist in the Visrez library our team will create the furniture and add to the library at no additional charge. As the library is shared with all our users it makes it valuable if everyone has access to an extensive library of furniture.
Yes, clients can collaborate on event plans in Visrez once they have been added as 'Partners' in your account. This is explained in detail in the Visrez user guide under Collaboration & Sharing.
Renovations and redesigns are included in the annual fee so if you update your spaces we match the new interiors. This can be done before construction is completed if interior design guides are provided.
Visrez can create event space models during preopening if enough details can be provided from the architects or interior designers. This will give your team a headstart with preopening sales and the spaces can be updated to match the finished interiors when those are ready.
There is no restriction to the number of users you can have in Visrez. Admin users on each account can add or remove team members without contacting Visrez support. As far as we are concerned the more users you have on your team the better which is why we don't charge per user account.
Yes, if you have a virtual just post the link in your account and this will be sufficient for our team to recreate the space exactly to scale and detail.
There are no set-up fees associated with Visrez. We charge a per space / year fee which includes the creation of the spaces.
Live training sessions are arranged for your team once the spaces are activated and ready to use. These usually take 30 minutes to one hour and cover all aspects of using Visrez.
We enjoy connecting with users and live training sessions are a great way to understand how new users interact with the tools. If a client has ordered more than one space we will conduct a live training session to get them started. If they have just once space we charge a small fee for the training session.
Once good quality reference assets are provided our team will generate a draft 3D Model of your space within a few days which is uploaded to your account. All members of your team will be notified once the event space is ready for review.
Once your team has approved the space the Floor Plan Builder will be activated in your account within 1-2 working days so your team can start making and sharing diagrams quickly.
A copy of your agreement is available inside your account under the contract section. Spaces are activated on an annual basis and new spaces can be added at any time. Visrez does not impose multi-year agreements or built-in annual price increases.
Sales&Catering.com serves over 10,000 users in the hospitality sales community with a strong reputation for building products that just work. The partnership between Visrez and SalesAndCatering.com has had a meaningful impact on the industry standards informing the event and meeting planning process.
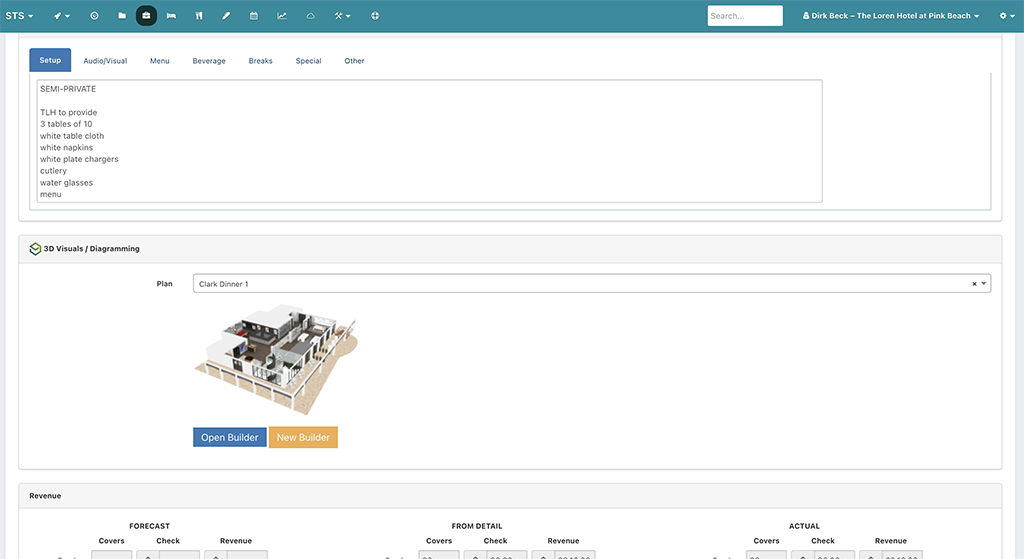
This integration allows users to automatically generate a 3D Event Plan in Visrez whenever they create a BEO in STS Cloud, with updates automatically reflected to ensure continuity and streamline the process. Planners and sales teams can easily toggle between proposals, contracts, menus, venue maps, and any other element of an upcoming event via a singular dashboard.
“The integration between Visrez and STS Cloud has been a game-changer for our properties. Offering guests a truly luxurious, memorable, and immersive experience is a core part of our offering and brand promise. With that in mind, having a sales tool that can seamlessly create immersive, photorealistic event plans has helped us ‘wow’ prospective clients and win more business”.
Dirk Beck, Director of Group Sales & Catering at The Loren Hotels
Third party developers can incorporate Visrez products such as Floor Plan Builder, Interactive Maps and Virtual Tours into their applications using our API resources. This guide explains the steps required to integrate Visrez products into any third party application with support available from our team.

return_to parameter (see Authentication below), so we need to authorize your domain.integration_partner parameter when creating a Plan, we’ll provide one for you once we have verified your company account. Please contact our support team directly here. API Documentation – Production
API Documentation – Testing
Note: The testing environment gets overwritten every night with a copy from production.
Each API call require an API key, which is linked to an account in our system. To obtain this API key, send your users to our login URL, adding get_api_key=true and return_to=<your_url> parameters. After user login, we’ll send back to the URL provided in return_to , adding the API key in api_key parameter.
Example:
https://clients.testing.visrez.com/users/sign_in?get_api_key=true&return_to=https://yourdomain.com/set_api_keyhttps://yourdomain.com/set_api_key?api_key=xxxxxxxxxx