Account Management
Inside Visrez
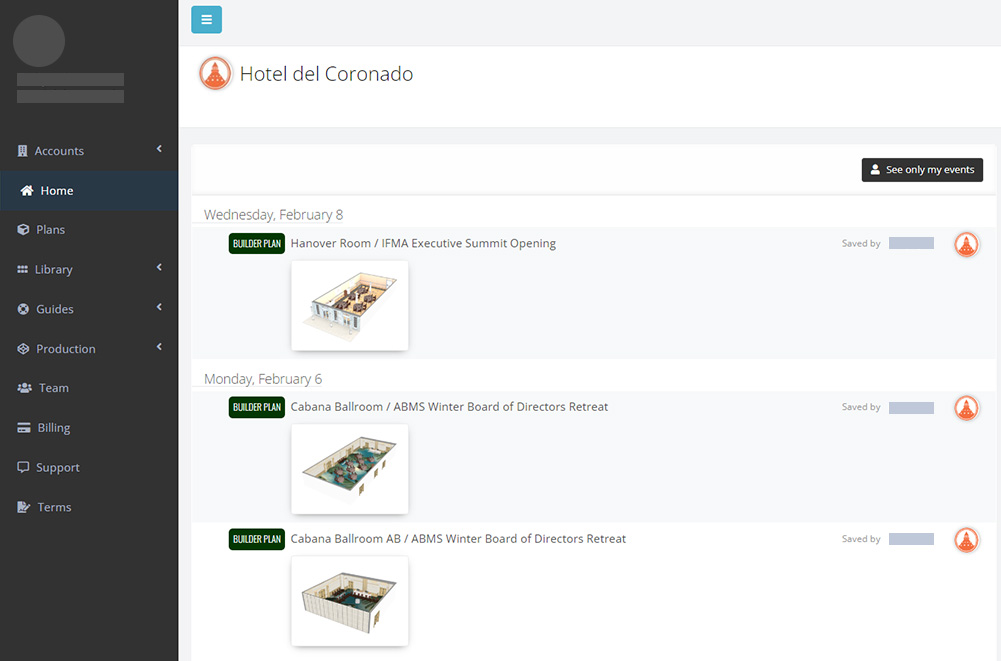
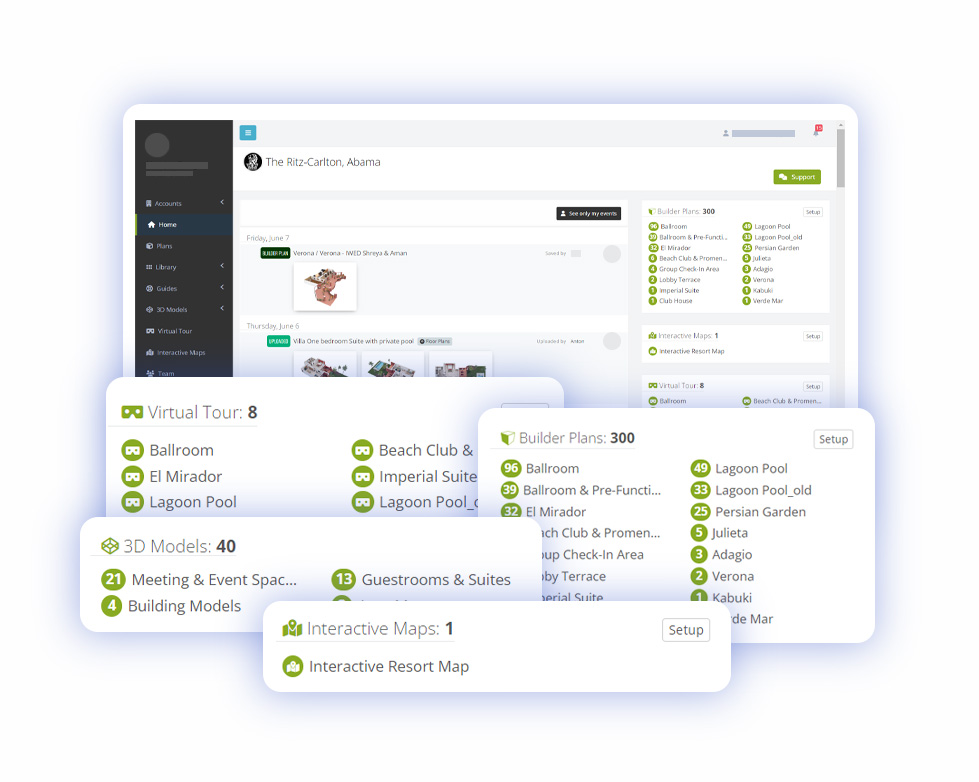
On the dashboard you will see a chronological history of all the activity in your Visrez account from the beginning. As plans are saved they appear in the timeline and can be opened directly from there. From here you can access all the products which are activated in your account using the menu on the left hand side.
Plans Box
The plans box displays a breakdown of the plans per event space. The top bar displays the total number of plans created across all spaces. Clicking on any space loads the plans page.
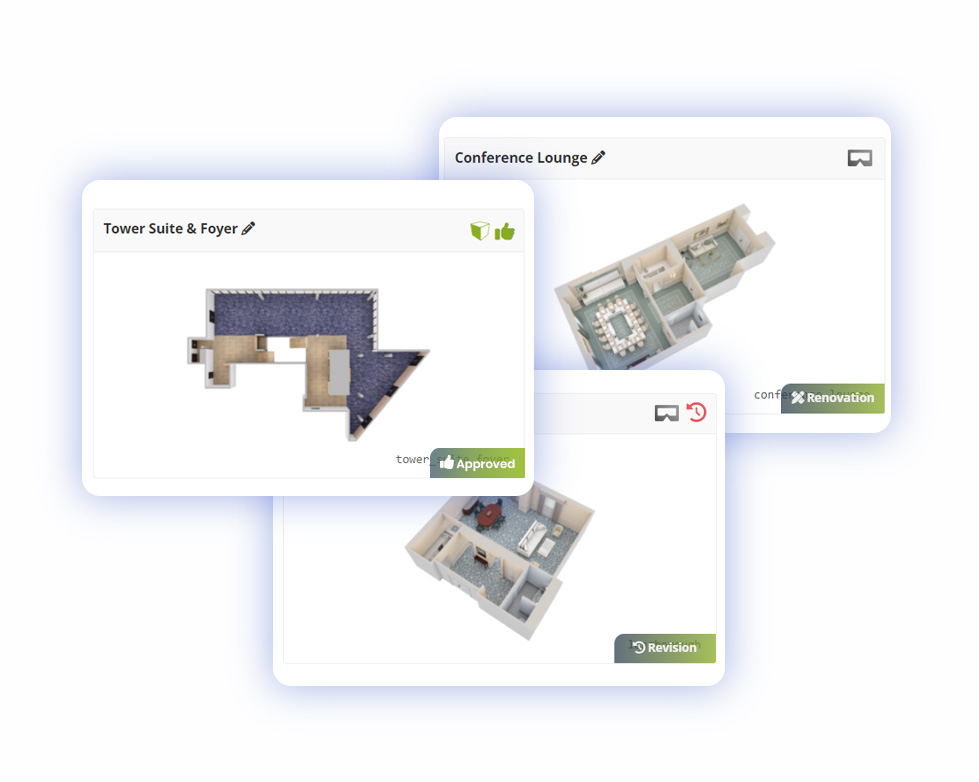
Plan Icon Guide
On the plans page have a number of controls available before you open an event plan in the builder

Edit Plan Name: The owner of a plan can rename it by clicking the pencil and then hitting enter.
Delete Plan
The Admin Contact on each Visrez account can delete or rename plans created by all other users.
Create a Copy
You can create a copy of any other user’s plan by clicking on the duplicate button below the event date.
Users can copy plans created by other team members and can rename or delete only their own plans.
Edit Tags
With tags, you can share a unique URL with your client showing all the plans across multiple spaces.
So if a group is using multiple spaces you can create a tag for that group and share a page featuring all their plans outside of your Visrez account. The remove tag option is located next to the tag name.
Share Link
From the shared page the user can open any of the event plans and if they have been set up as a partner they are able to edit any of their plans. Remember anyone with access to the Shared Page Shortcut will be able to view the plans but only partners can edit plans.
Approve Event Plans
Once a plan has been approved it is marked with a green icon on the /plans page so it is clear to the team.
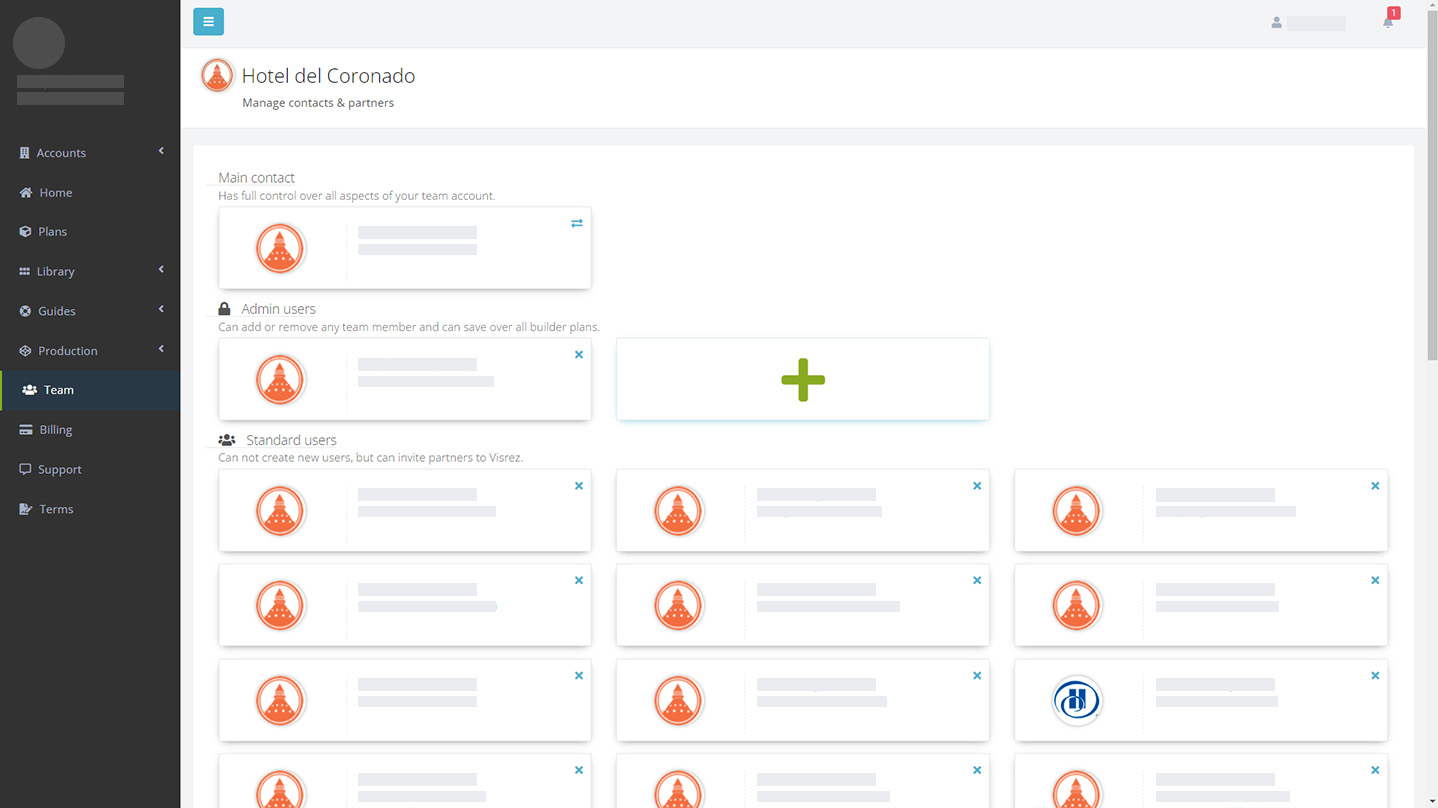
Visrez Account Administrators
The admin users on your team can manage all aspects of the Visrez account. There are no restrictions to the number of users you can have in your team account but only admins can delete users from Visrez. Visrez accounts can have multiple admin level users. To add a new user to your account just enter their email address and they will receive an email signup immediately.
To stop Visrez emails from going to spam, you need to whitelist the sender orders@visrez.com in your email client (Gmail, Outlook, etc.) by adding it to your safe senders list , ensuring emails land in your inbox instead of junk.
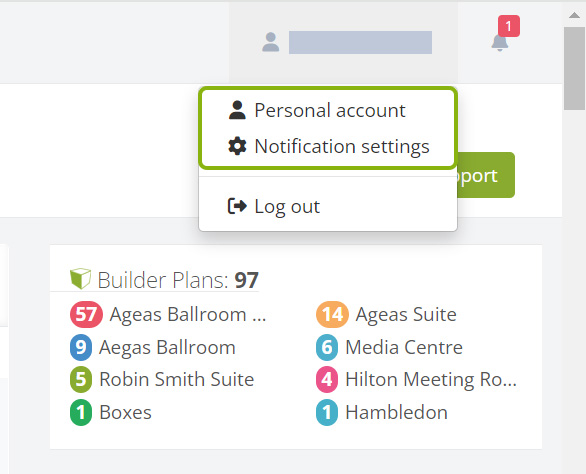
Personal Account & Managing Notifications
Users can update their profile in the top right-hand corner and disable system notifications. This includes the weekly asset reminder emails which are automatically sent during production when assets are outstanding. It also includes the weekly usage reports for embedded files which are displayed in client sites. If you no longer wish to receive these emails you can disable them in your account here.
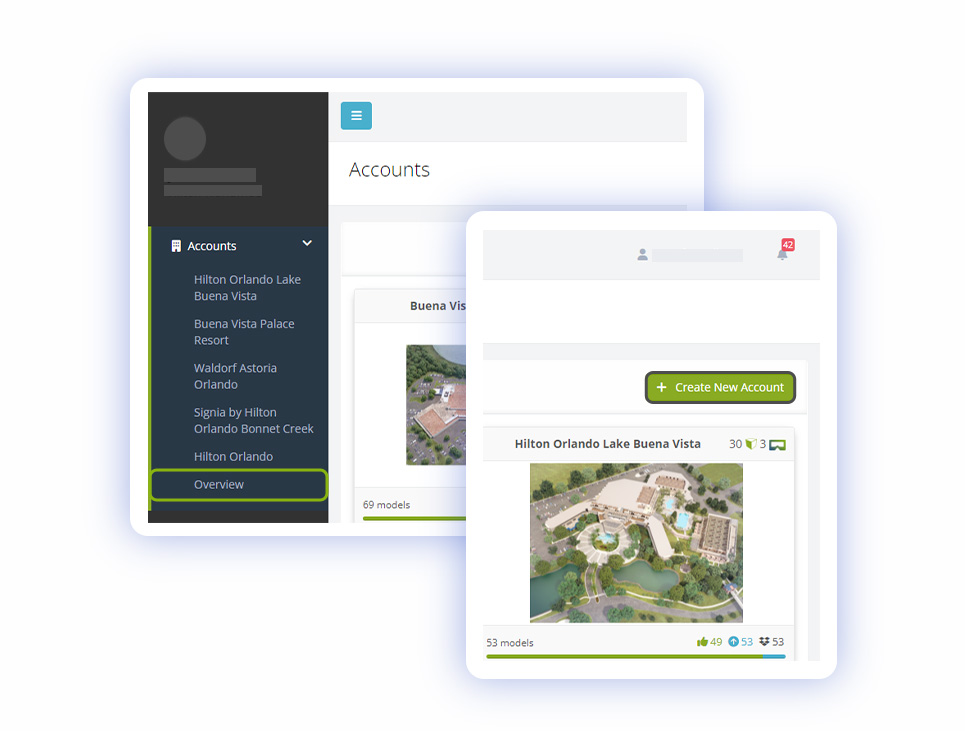
Creating Accounts & Adding Spaces
The Overview menu shows list of all accounts. To add a new account use the Create New Account button. Details for the account can be entered – Description, Permalink, Brand and Country.
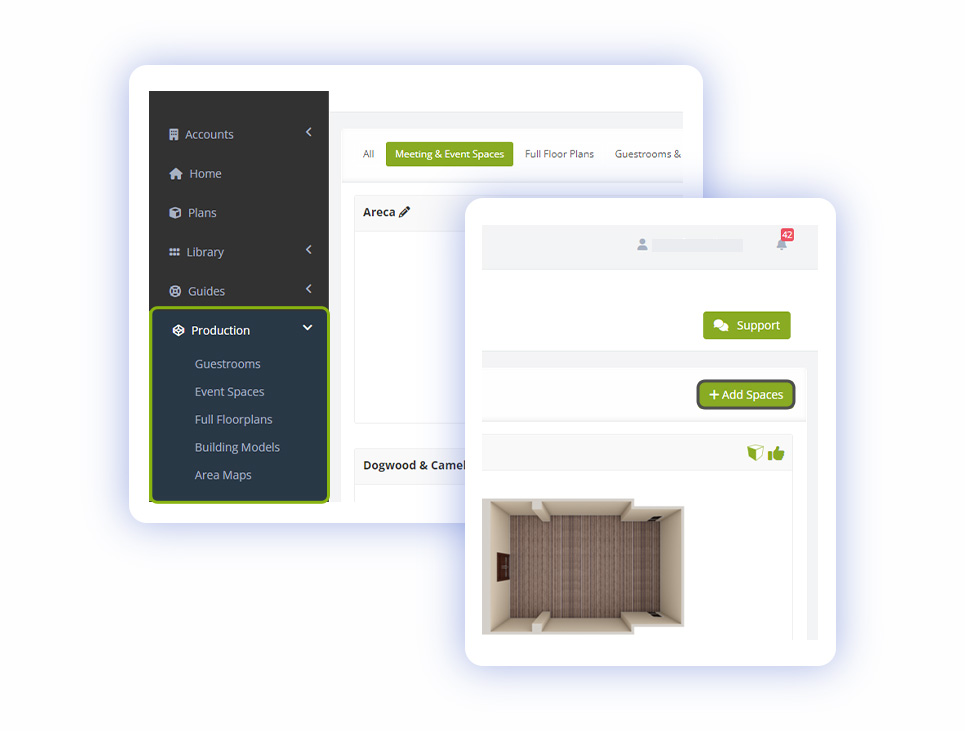
Creating Spaces
All categories can be listed from the Production menu. Spaces can be added from the Add Spaces button.
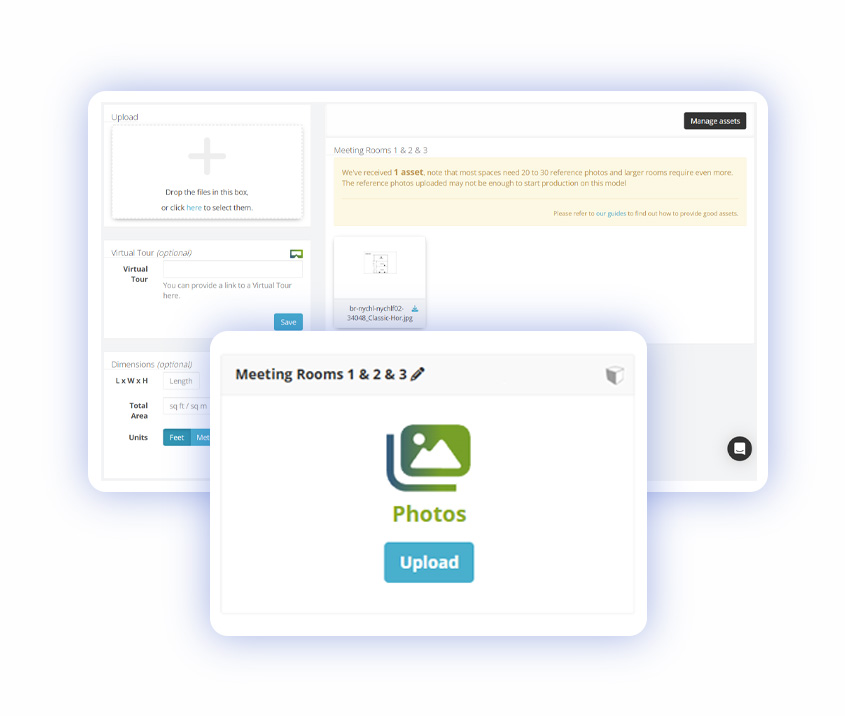
Uploading Assets
All assets can be uploaded from the Home menu in your account. Choose the Upload button then drag and drop or select photos to upload. Virtual links and dimensions will help to create a more realistic space.
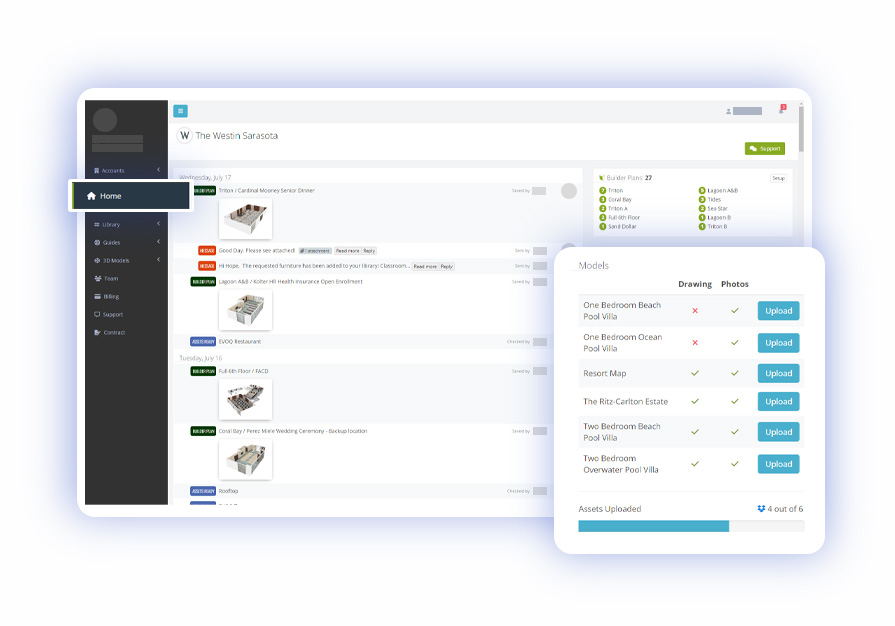
If there are missing Photos or Diagrams in the 3D Models menu will be displayed what exactly is needed and an email will be send. Click on the Upload button to add more assets.
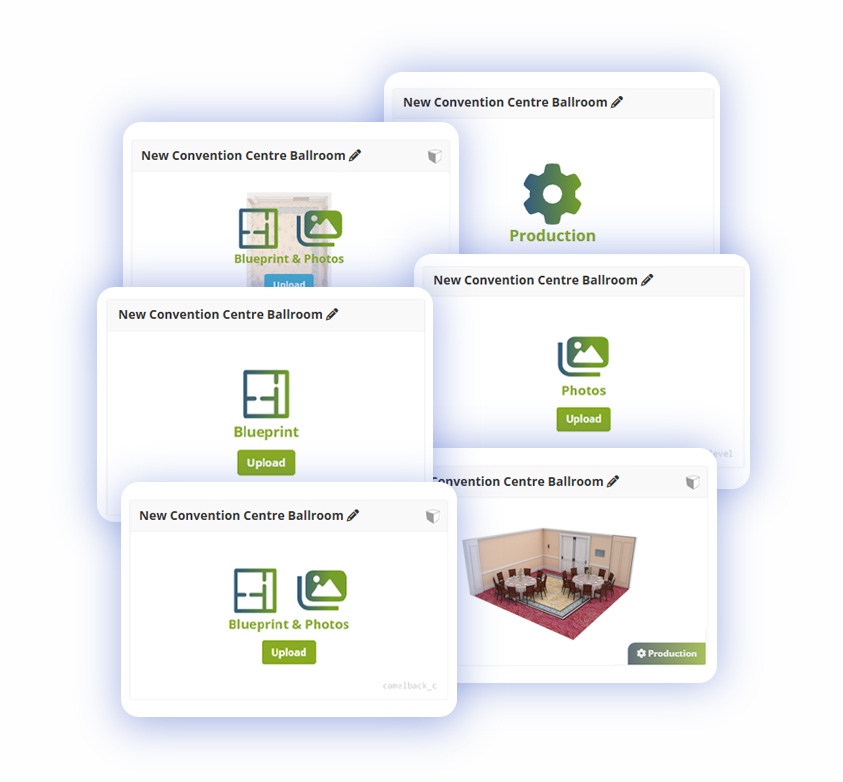
Once everything is uploaded production process will start.
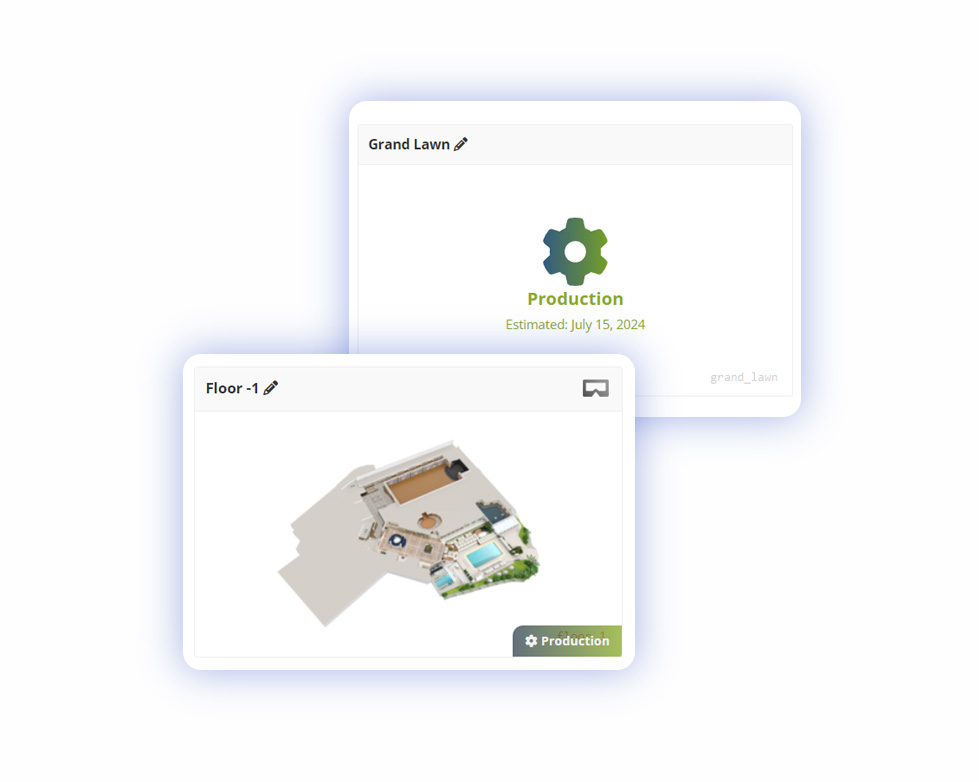
When a model is ready you can approve or send it for revision and renovation.