
Advanced Features
Stages
There are many ways to add stages to your event floor plans in the Builder. You can drop in a specific stage size from the Visrez library or create custom stages to any size using the Builder tools. It is fun to watch a stage being created to scale inside your 3D event plan. Select the stage object from the Library and choose between adding a specific number or Build Stages & Platforms options.
Dancefloors
There are a few ways to add dancefloors to your event floor plans in the Builder. You can drop in a specific dancefloor straight from the Visrez library or create a custom size using the Builder. The build option allows you to drag your mouse to the size you need and the dancefloor gets built automatically. Both options are shown in the animation and you can see how easy it is to create dancefloors of any size.
Rigging a Truss
To drop screens into the space from the ceiling you can use the Truss Rigging feature which allows you to hang horizontal trusses at variable heights over your space and hang screens (or lights) from those. This is done using the suspend to ceiling feature and the Move tool when active with + / – Hotkeys to increase or decrease the height. The initial height is parallel to the top of the walls for an indoor space or at the height of the tallest object in outdoor spaces.
Text Notes in Plans
The text tool is located at the bottom of the main menu which allows you to add notes onto your plans. This is a great way to mark up plans before sharing with clients for feedback and approval. To add notes write the notes in the text box and click on any point or object on the floor plan. Font, color and size can be adjusted in the sidebar along with the text box background to ensure it clearly stands out against the floor texture. Text can be placed on top of objects such as tables, stages and dancefloors.
Graphics Tool
Just click on the model and drag the arrow or Circles & Square options to save it onto the floor plan. This is a great way to indicate large event spaces and the drawings are displayed in PDF exports. Directional arrows allow you to indicate the flow of traffic in an event diagram to differentiate between entry and exits.
Client Logos in Plans
Sharing a 3D event plan featuring their logo on screen guarantees a great first impression and will help your venue stand head and shoulders above the competition. In the Audio Visual category of the Visrez library, you will notice the screens display an icon beside the + or check mark. This icon indicates that this object allows users to upload a logo for your plans. Once the editable object has been added to your collection you will see that the image icon is blue to indicate that you can upload a logo to your library and then select that logo from inside your builder.
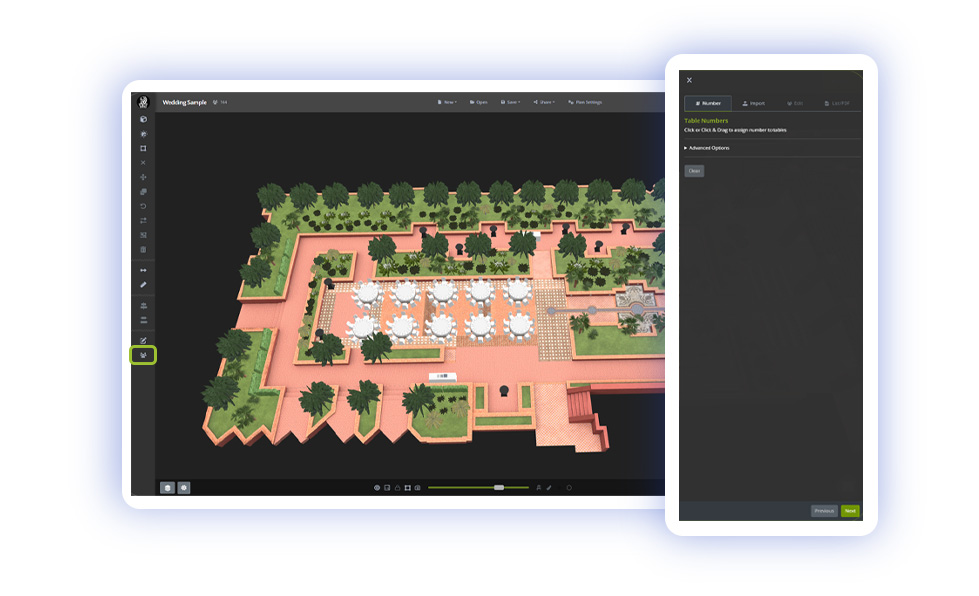
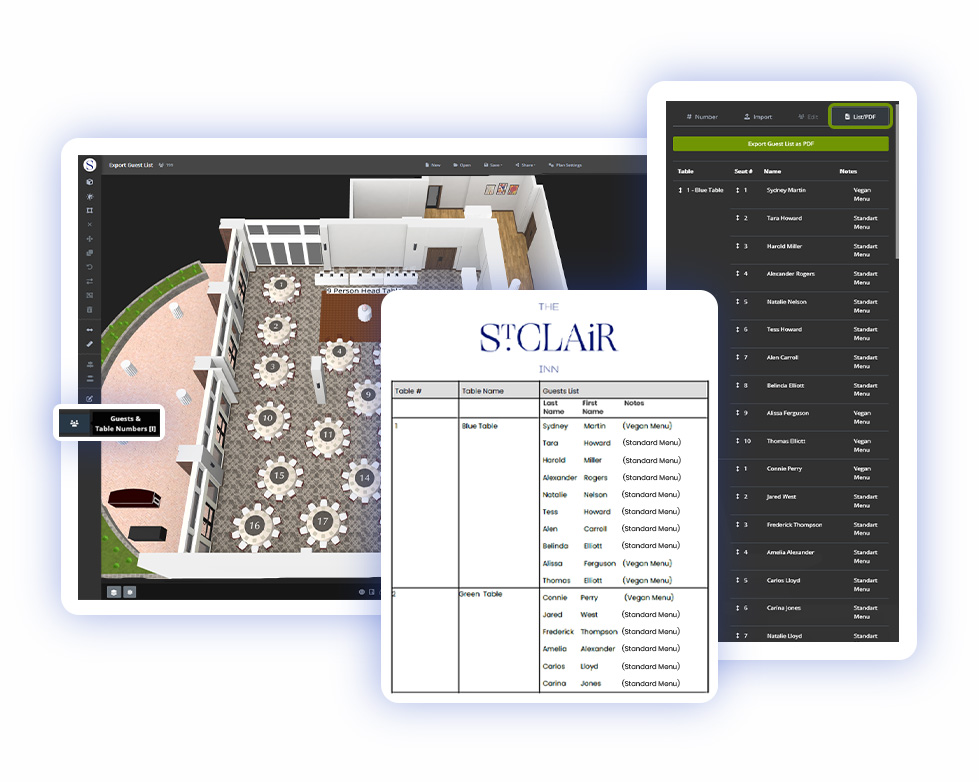
Table Numbers
The first step is to draw on table numbers and save them in your plan. This can be done by either clicking on the tables one at a time or by clicking the left mouse button and drawing a path over the tables. Numbers must be saved before you can upload your list so once you are happy with the order click save.
Table Numbers can be rotated or styled to fit any room orientation.
Share > PDF Export Settings > Show Table Numbers > Tag Options.
Importing Guest Lists
Guest Lists can be added by either uploading a CSV file or by entering guests manually on a table-per-table basis. Importing a CSV file is a lot faster than entering the names one by one so we recommend this option. The guest list tool is only activated when tables have been saved to your event plan.
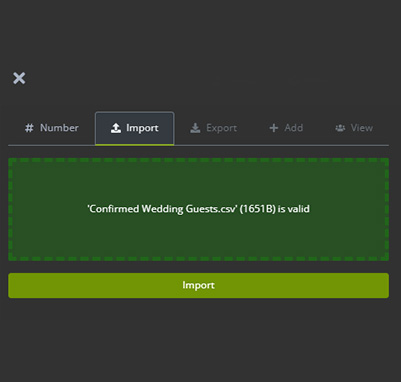
Importing Guest Lists from CSV
The quickest way to populate a guest list is to import from a CSV file. After table numbers have been saved you can then import a CSV file by dragging it from your computer or by clicking within the import area.
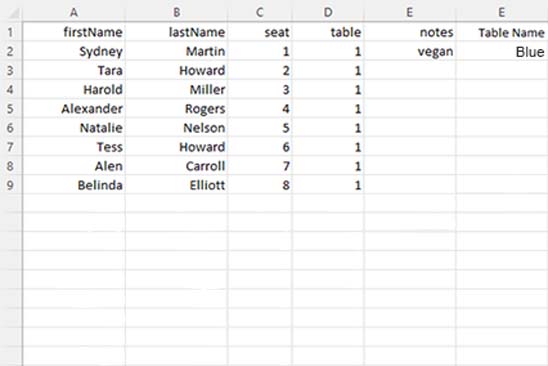
CSV files should be formatted as follows
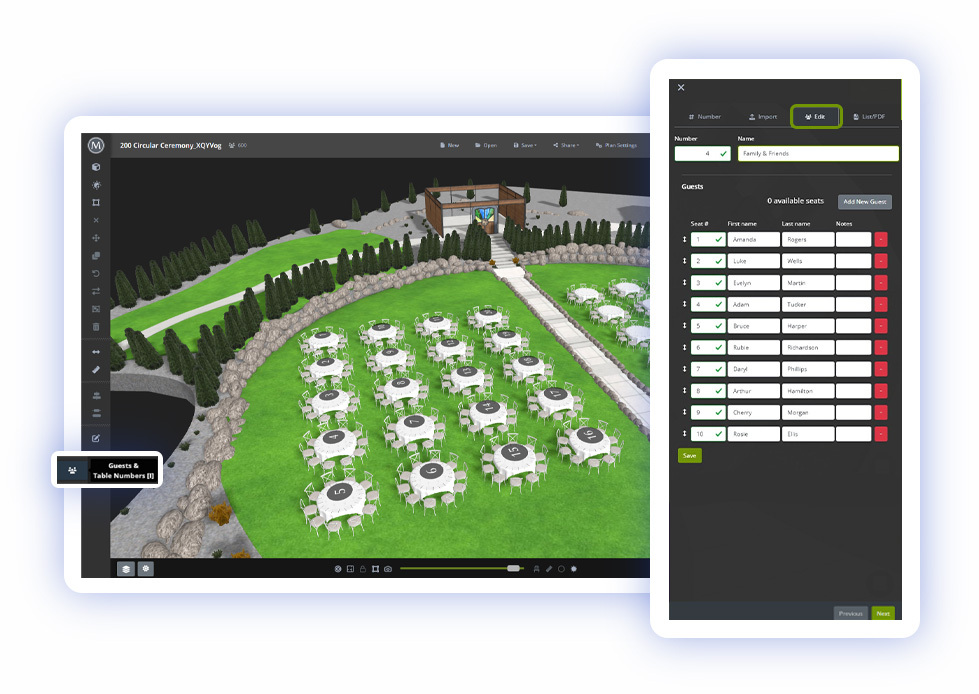
Adding or Editing Guests without Import
Guests can also be added on a per-table basis by clicking the table and selecting the guests’ tool in the left side menu. Using the Add tool you can then manually enter guest names, and table names for each table in your plan. Once guests have been imported, all names in the plan are listed under the View tab.
Guest lists can be exported as a PDF under the Share > Export option
Exporting Guest Lists
Guest lists can be exported with the event plans or as a PDF from the share settings.
Copy & Paste Plans from One Space to Another
If you have created a plan in one space and would like to see how it looks in another space you do not need to remake the plan as you can copy and paste from one space to another.
In your Event Plan – CTRL & A (to select everything) and CTRL & C (to copy)
Open the new event space from the Plans Page (An empty space) CTRL & V to paste into that space.
All spaces have different dimensions so will need to adjust to fit using the Move and Rotate Tools.
Creating 3D Plans from CSV Files
Capacity charts can now be converted into 3D Event plans with one go. Users can generate 3D event plans for every space and set-up style just by uploading a CSV file to their account or by entering in the desired setups and capacities. Automating the creation of 3D Event plans is a massive timesaver for sales, catering and operations teams as they now have the ability to quickly generate an unlimited number of 3D Plans from a single CSV upload for each space.
How to Rig Lights
Not an everyday feature but a very nice option to impress your client by adding coloured lights onto screens, backdrops or walls to create some genuine atmosphere in your event plans. It is easy to do once you have selected the right objects from the library and these can be placed on the ground to hung from a truss depending on the plan.
Atmospheric Lights
With Atmospheric Lights, your plans become even more realistic, bringing them to life and creating a genuine atmosphere for your event.