Visrez Floor Plan Builder
Drag & Drop Folder Tools – April 2026
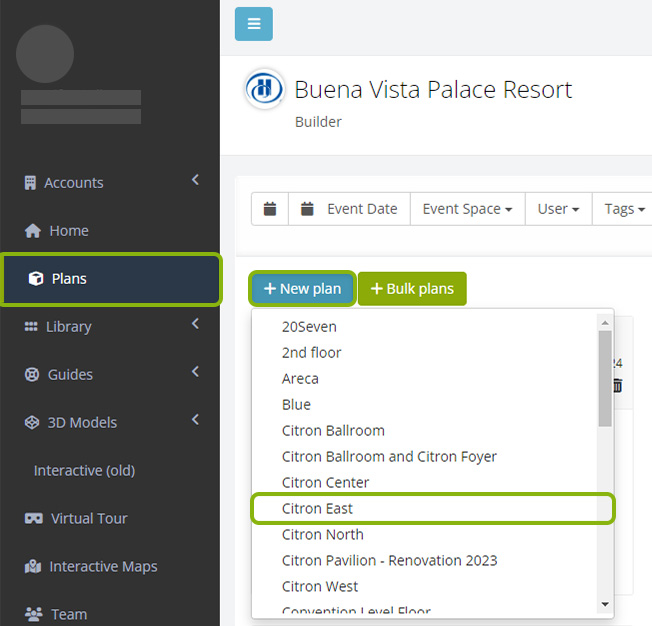
Floor Plan Builder has received a major update with the introduction of new folder tools, designed to improve how event plans are organised within the platform. This feature has been highly requested—particularly by larger client teams which see hundreds of plans created each month. The intuitive drag-and-drop functionality for moving plans between folders, along with options to rename, delete, and archive plans significantly improve the organisation of event plans in Visrez. Our development team has added the ability to Archive plans into an archive in the event that someone deletes a plan and later needs to restore it. Given the growth of the Floor Plan Builder in recent years, the addition of folders is an important step toward improving the user experience. As there are no restrictions on user numbers in Visrez, client teams can contain a large number of users and our team recognised that a more robust folder system was essential for the smooth day-to-day operation for Floor Plan Builder clients.
Videos Walls – December 2025
This brings immersive experiences to life allowing videos to be displayed on screens inside event plans. Each account now features a small library of abstract video graphics which can be placed on screens. Alternatively you can upload a custom video to your library and display it on a screen. Our team will add support for Video URL embedding so you can copy & paste a video URL to play on a screen or video wall. Below is an example of a custom request where the venue featured immersive video walls. This works in the same way as adding a logo or videos to a screen to create a powerful immersive effect.
House Lighting Controls – October 2025
Following up on the great response from our July release we have added another lighting control for the house lights in any space. This is really cool and as it allows wall lights to be turned up or down for added atmosphere in your event plans. Please note for existing event spaces this requires a quick adjustment to the code so this feature is available on demand and can be requested through the support channel.
Moveable Lighting Controls – July 2025
In response to popular demand, our team has created enhanced light controls in the Floor Plan Builder. These new tools include Bulb Lights and Spot Lights which bring a new level of realism to 3D event plans and are incredibly fun to use. Our new light tools will help sales team convert more group enquiries by adding atmosphere and ambience which is guaranteed engage clients during their venue selection.
Event Plan Template Library – June 2025
Our team has added a collection of more than two hundred event plan templates covering the most common event styles. Plan templates can be adjusted in size using a new feature located in the spacing tools menu. Event plans can be copied & pasted into custom spaces and provide a great source of inspiration to our users. The idea behind this update is to reduce the learning curve for new users in Visrez and to allow partners to create plans without needing to get custom spaces built out first. Our design team has done an incredible job in putting together over 200 event templates, packed with cool objects and layouts.
The release also includes the new ‘skybox‘ which brings plans to life with a bluesky background with the option to toggle between different times of the day and add enhanced shadows to the plans. Feedback so far has been really positive and users love the new bluesky background canvas whilst working in the builder.
The February 2025 release includes an enhanced ‘spotlight tool‘, advanced ‘select, move and rotate‘ tools and a new ‘elevation tool’ which allows objects to be suspended at any height in the event plan. These are great updates to the builder which are demonstrated in the video below.
Thousands of Event Professionals, Sales and Operations teams use Visrez to create professional 3D Plans. Visrez has grown by word of mouth with no outside investment thanks to the quality of our products and customer support. Our team constantly improves the platform based on user feedback, releasing new features monthly with no upgrades fees. Every account gets the same software regardless of the number of spaces activated and clients can manage their own teams without limits on user numbers.
Drag & Drop Creation Tools
Users can drag & drop objects from the collection into the plan which is suited for objects which are not used in larger quantities. So for single objects you can just pull one straight from the collection panel and place on the floor of the plan.
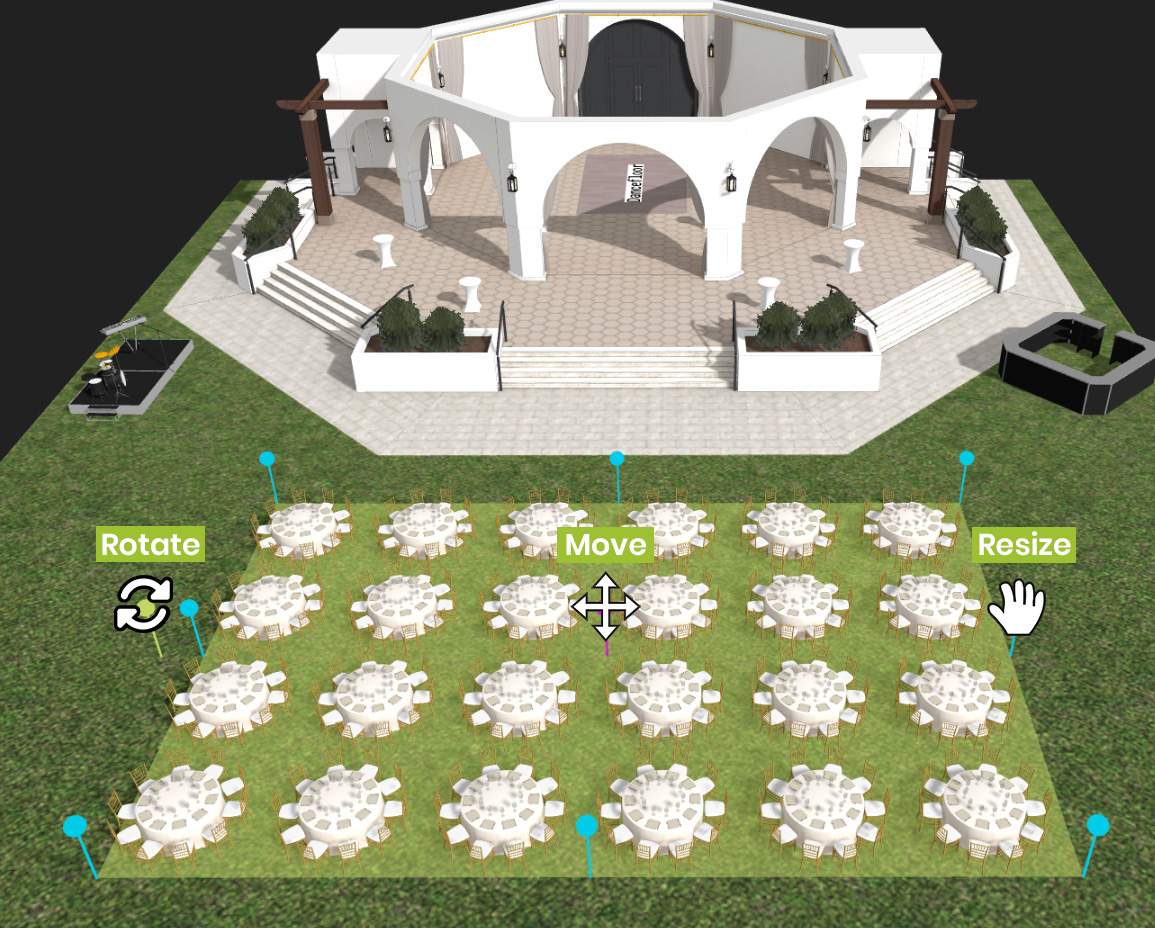
Intuitive Object Controls – ‘Expand, Reduce, Move, Space, Rotate’
The latest release combines the blue expand circles with the move and rotate tools. Now by clicking on any single object or block of objects in your plan you can increase that block using the blue expand circles.
Drag to Draw with a Mouse
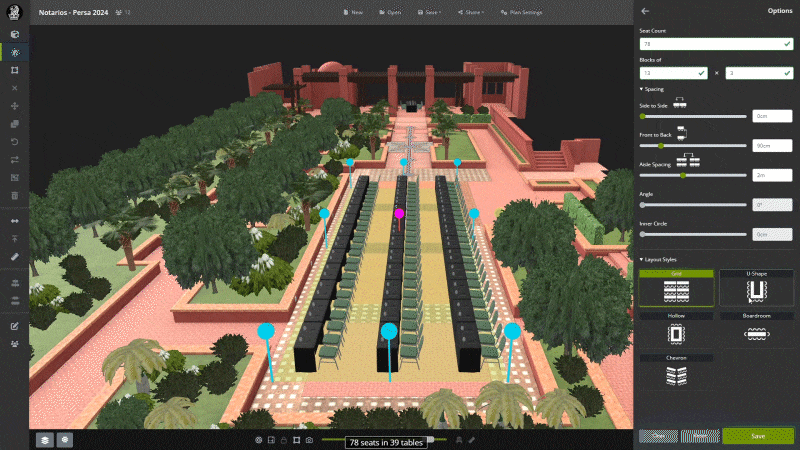
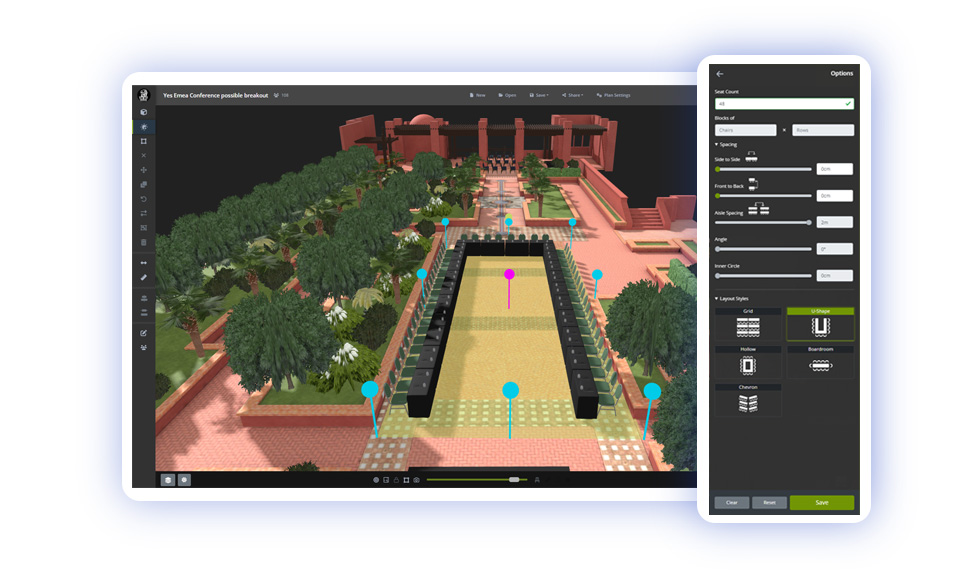
The Build Tool allows users to create plans in many different ways and is fun to work with. Users can specify the exact number of objects or draw with the mouse to fill the space. Sliders adjust the front to back or side to side spacing and you can also set the Aisle spacing or inner diameter for circle or semi-circle layouts.
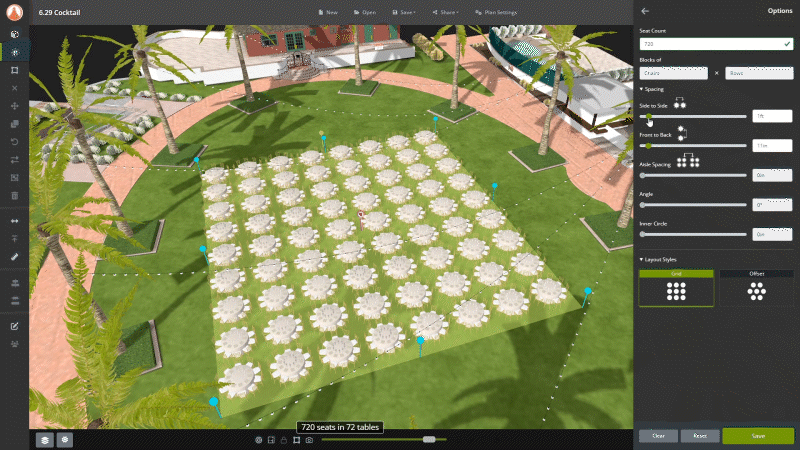
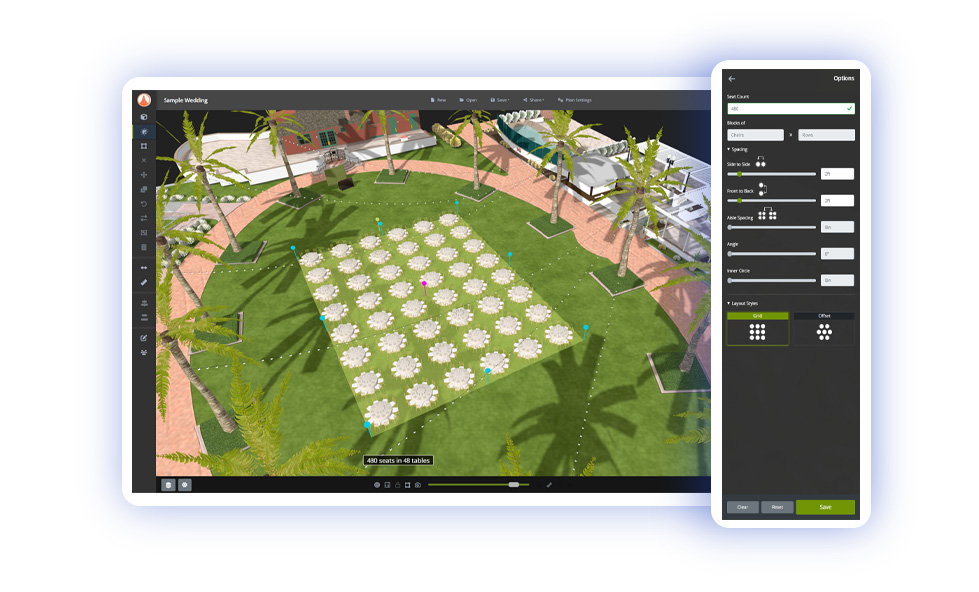
Leaving the number field empty allows you to draw a set-up by clicking and dragging the mouse inside the spаce. You can increase or decrease the selected area using the blue markers to add more objects.
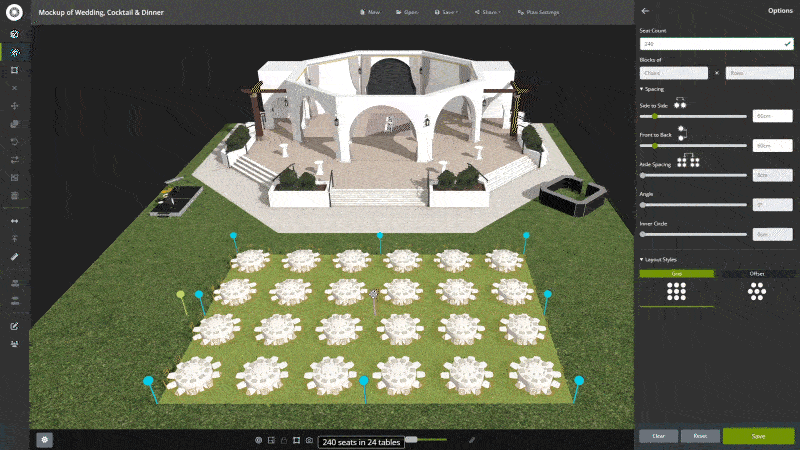
All styles can be adjusted using the layout style buttons and the object spacing allows you to increase or decrease the amount of spacing between furniture. Once the set looks good, click Save or Clear to start over.
Main Menu Controls
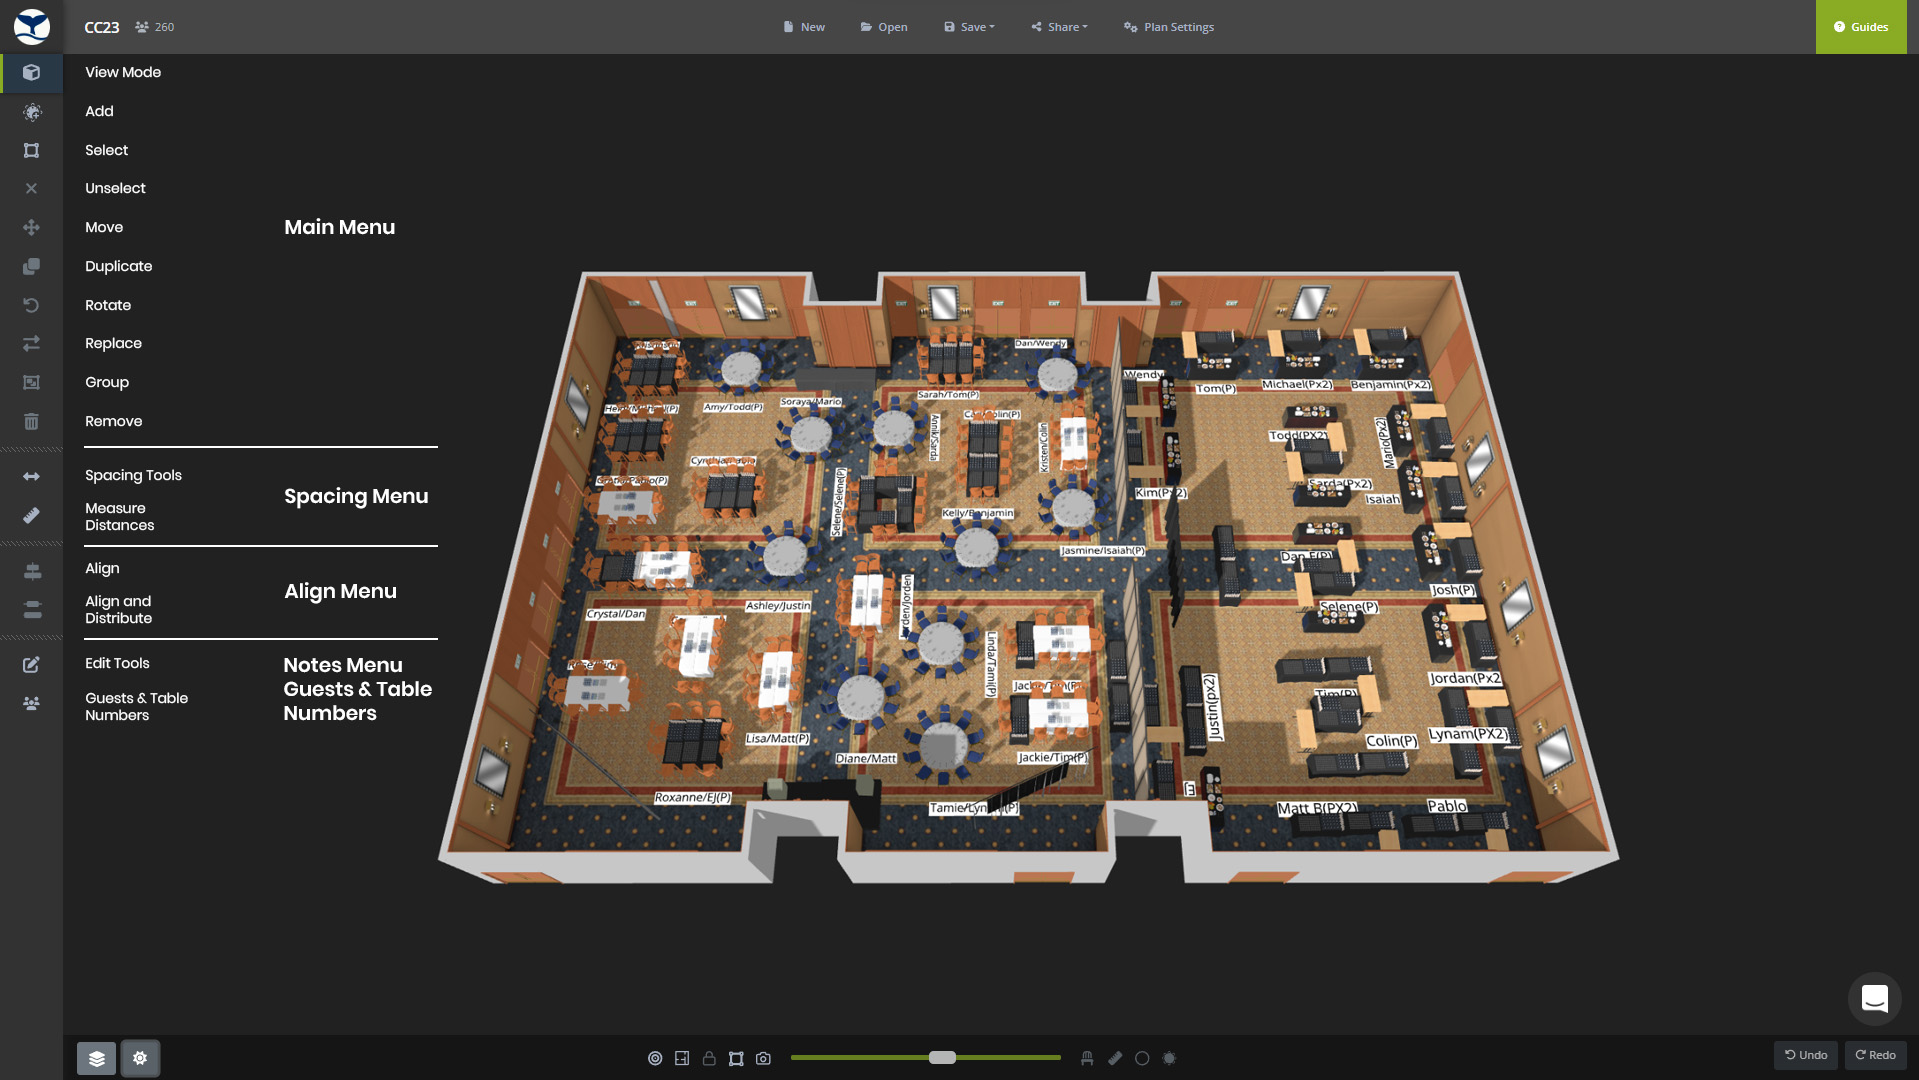
Upper & Lower Menus

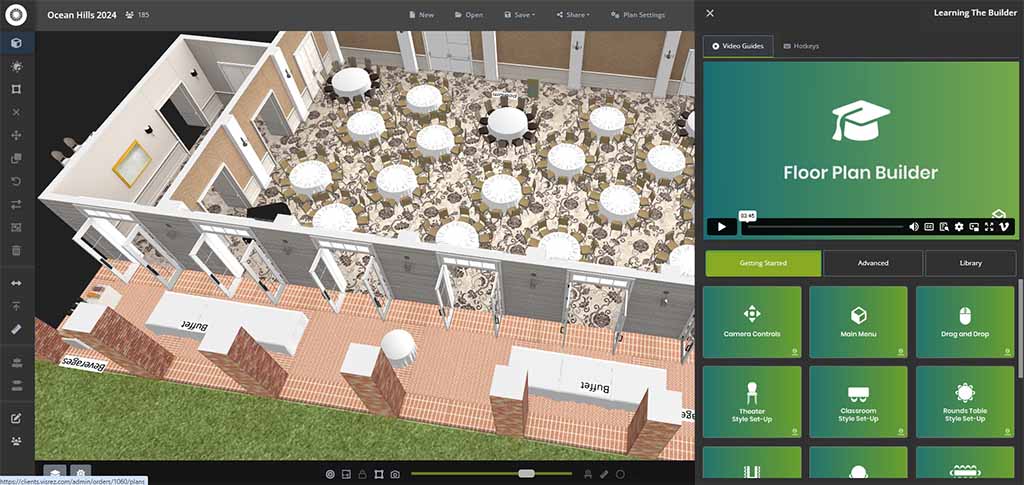
Video Guides in the Builder
In the top right corner you will see the User Guides which explains everything about the builder.
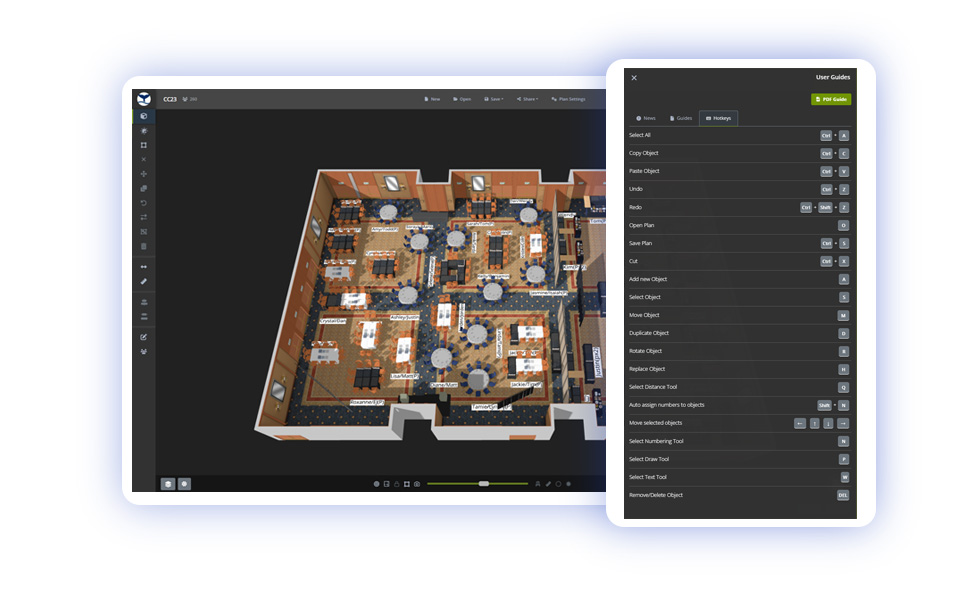
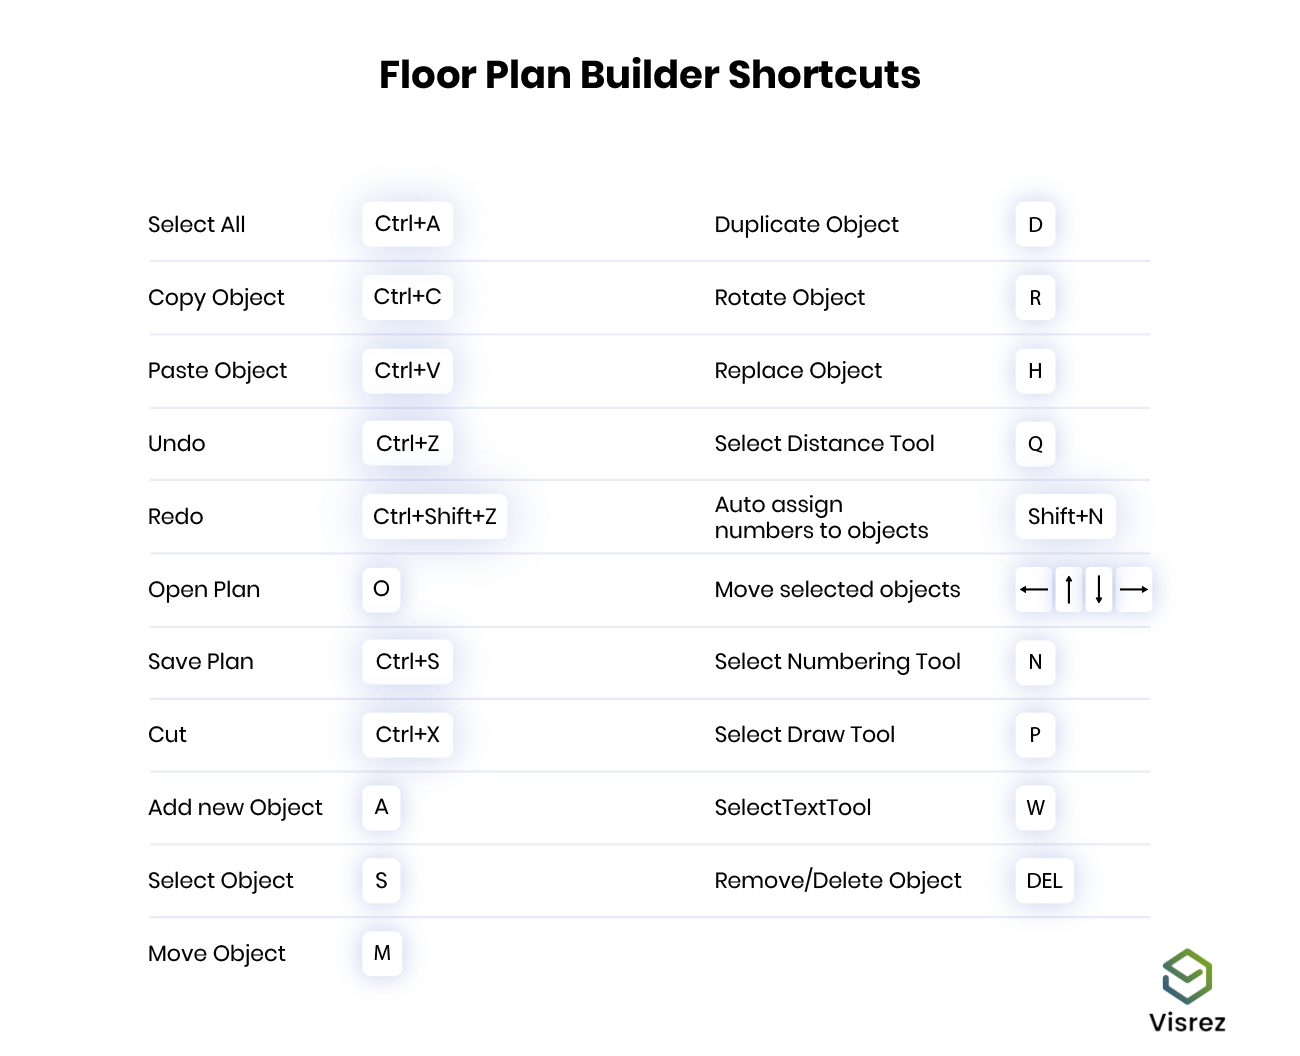
A list of shortcut keys is in the top right corner of your builder, we recommend learning these keys.
Lock Camera for 2D Diagramming
The lock function allows you to stop the room from rotating and is an ideal way for users to work in 2D format by first clicking on the Top-Down button in the lower menu and then clicking on lock the camera. This holds the space in a 2D top down position allowing ubjects can be selected, moved, duplicated or rotated without the space moving. Users can zoom in / out of the space without moving it sideways which allows you to create perfect 2D plans.
Align Selection to View
Selecting objects with the mouse in a standard shaped space is simple but as we all know spaces can come in all shapes and size. If you need to diagram in an unusual shaped space the select tool can drag against the way you actually need it to go. For example in a diagonal or non-standard shaped space you may want the select tool to go in line with the room or furniture but it doesn’t. To solve this problem our team developed a feature to allow users to toggle the direction of the select tool in line with the direction of the space.
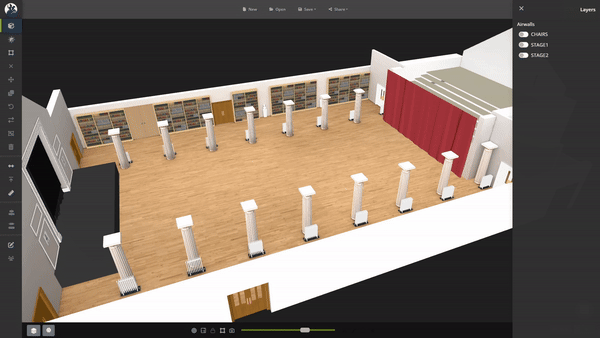
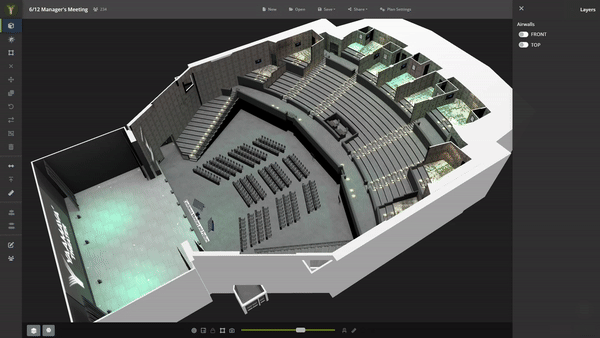
Layers & Airwall Controls
In the bottom left corner of the menu you will find the layers tool. This tool opens up a right side panel which contains a list of the elements within your space which can be turned on-off. Airwalls can be represented by a number or letter which allows them to be opened or closed. They can either be fully opened or closed. To partially divide a space it is recommended to use a room divider object from the Visrez library.
The carpets and flooring elements in a space can also be deactivated using the layers tool as quite often the design pattern on carpets can be quite busy and make it difficult to view the furniture in the plan.
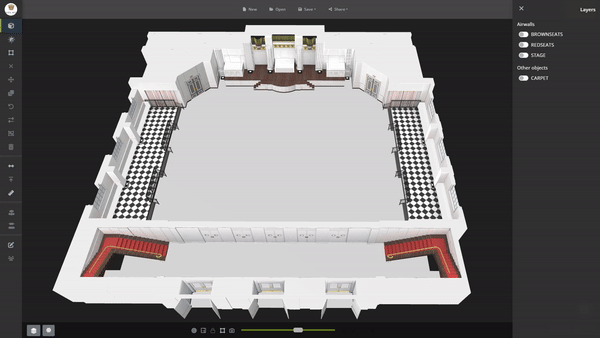
In some event spaces there can be fixed seating elements which can be removed as a block to allow different furniture to be set-up in those areas.

In outdoor event spaces layers can be used to switch off elements such as trees, string lights or fixed objects such as tents, gazebos or catering trucks to allow you to build the plan without the distraction.

Theme Settings
In the bottom horizontal menu there is a settings icon which does a couple of things. You can switch the builder background from black to white and adjust the level of sunlight in the plans based on the time of day. This is a great way to bring outdoor event plans to life by showing where the sun will be throughout the event.
To start a new event plan go to the Plans page, and select Space from the dropdown menu. This will open up a blank builder of that space to allow you to create a plan using an empty space. Inside your builder you can also find all the plans created by all team members by clicking on the Open button in the top menu.