
Menu Legend:
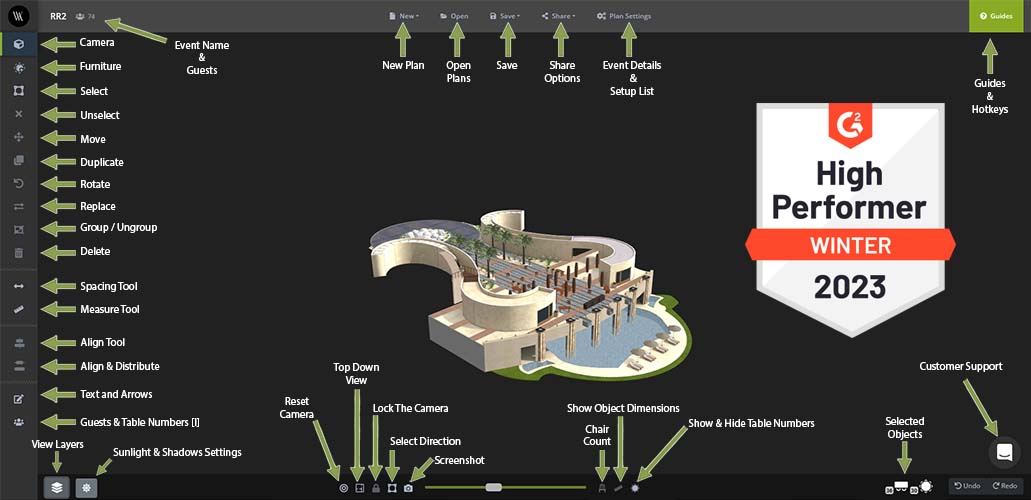


After the first set of controls we have the Spacing Tools Menu:

The next section contains the Alignment Tools


The Bottom Menu contains a number of key tools:


To perform any action in you need to first select the object using the select tool.
Objects can be selected with the Select Tool (Shortcut = S) , or CTRL + A (Select All) or by double clicking on the object.
To select multiple objects you can hold the CTRL Key & Double Click.
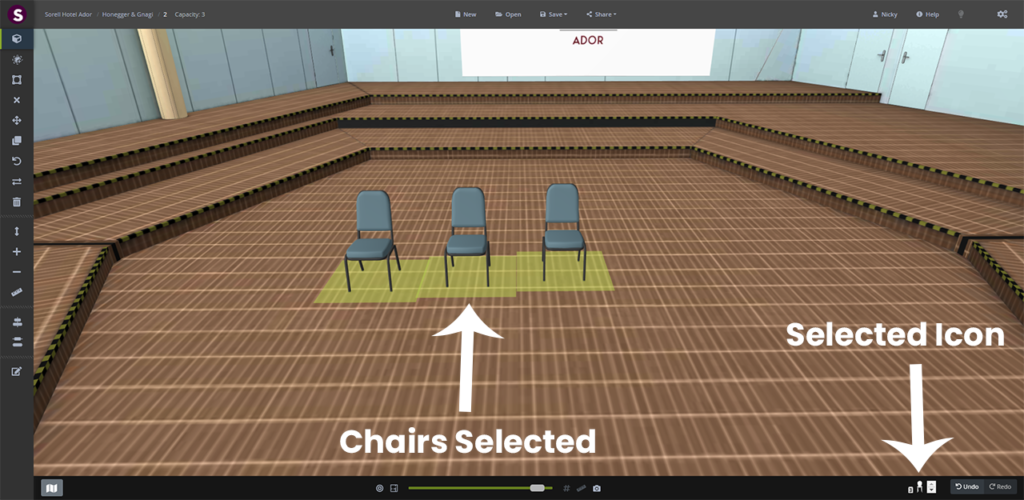
All selected objects are highlighted yellow and an icon summary is displayed in the lower right corner of your builder.
To free rotate the selected objects press the Rotate Tool (Shortcut = R) and drag in a circular motion anywhere in the Floor Plan Builder, to rotate by 22.5 degrees hold the Alt key, to free rotate multiple objects around their center hold Shift and for 22.5 degrees Alt+Shift.
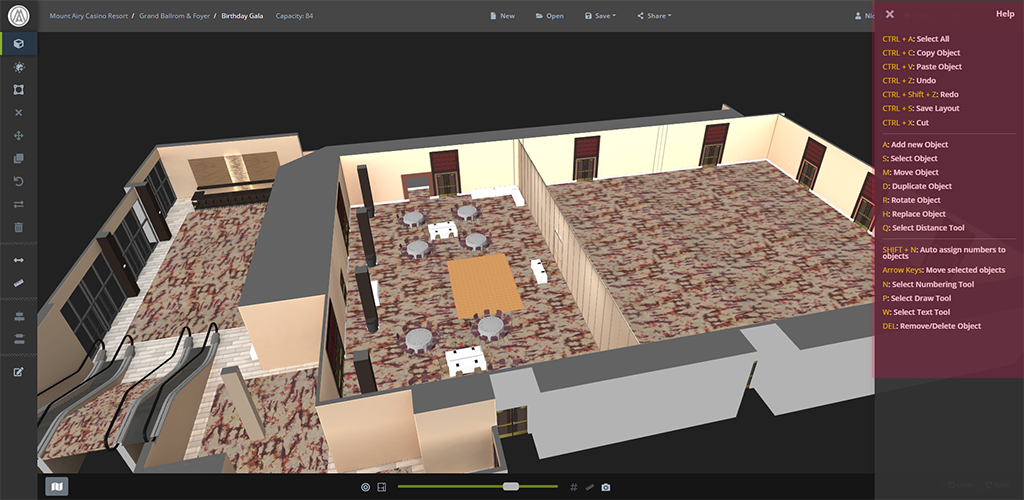
A list of shortcut keys is in the Help section in the top right corner of your builder.

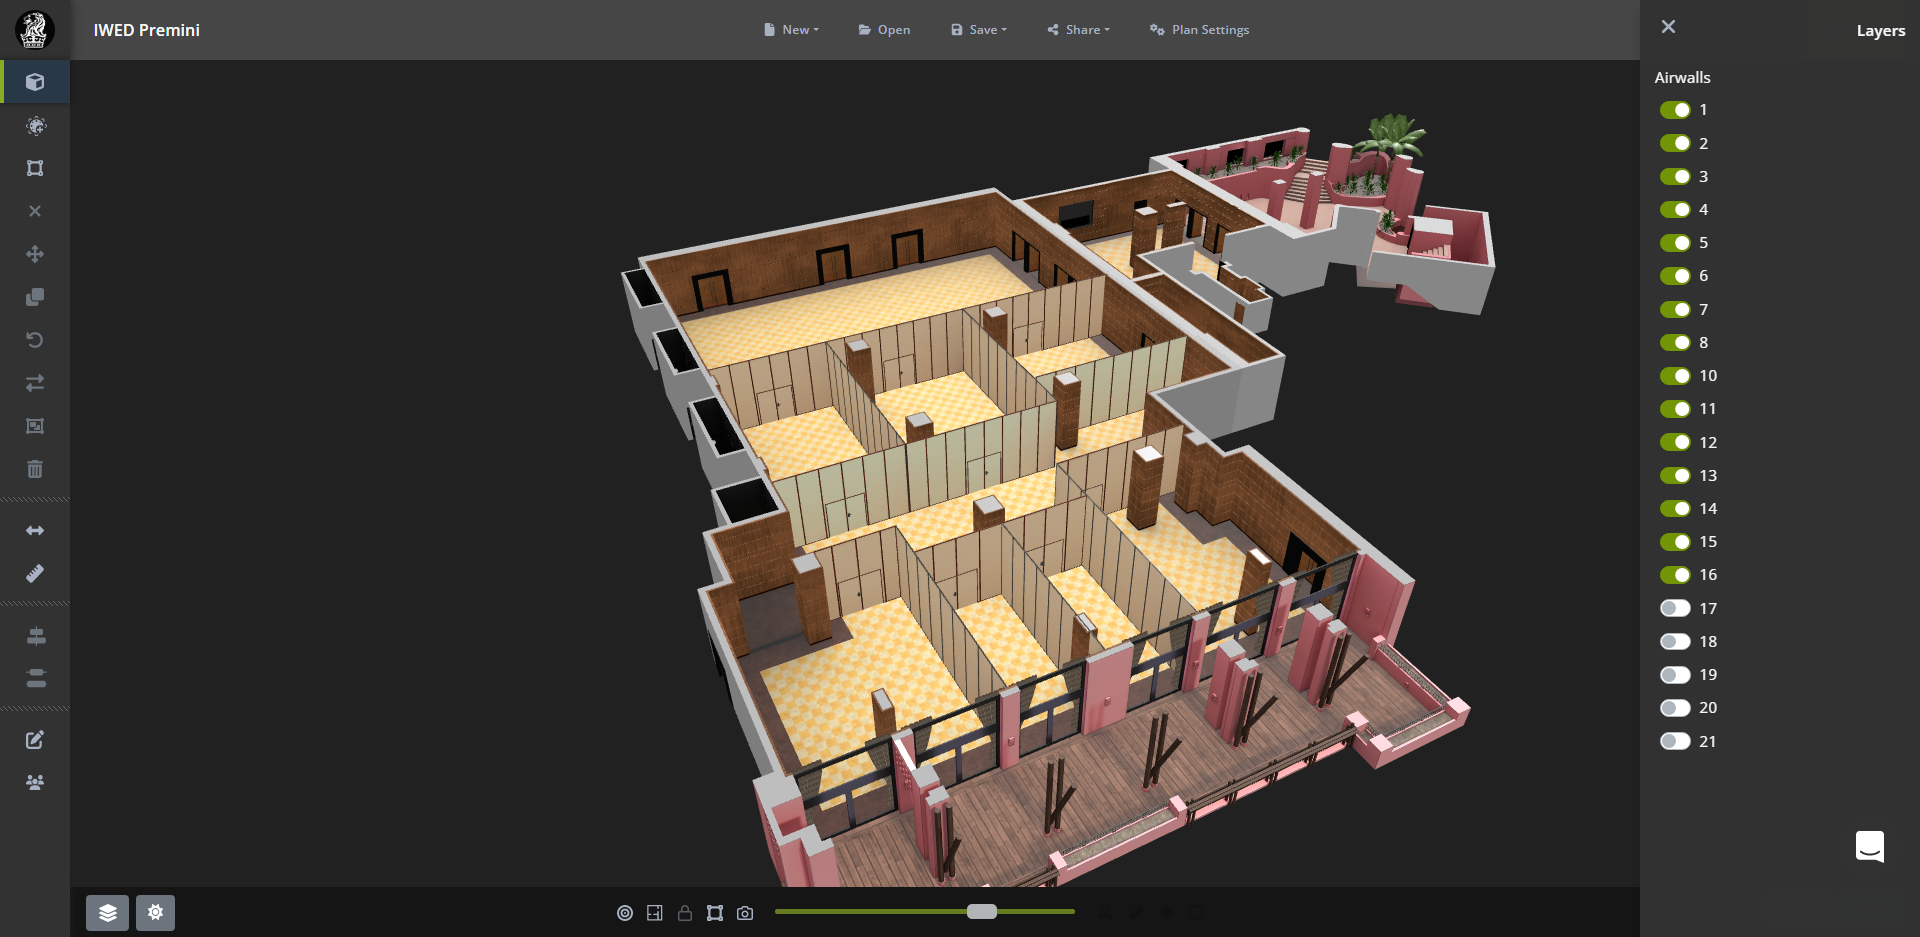
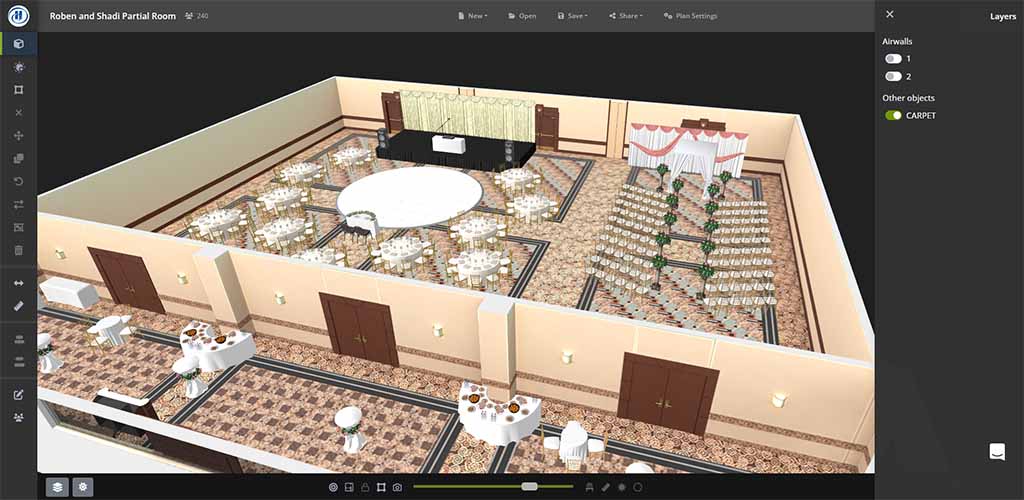
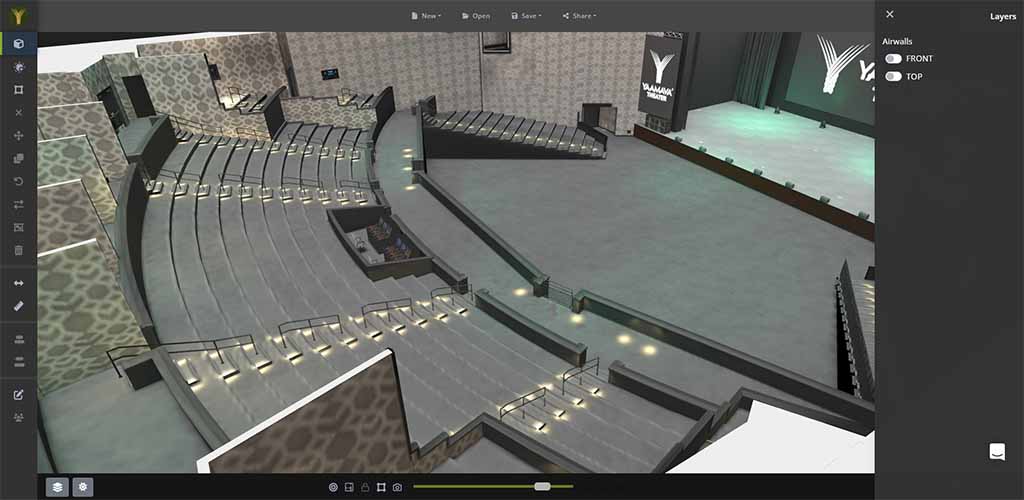
In the bottom left corner of the menu the layers tool controls optional elements within an event space. Clicking on the layers tool opens up the right side panel which contains a list of the elements within your space which can be turned on-off using the layers control.
Airwalls
Each airwall in the space can be represented by a number or letter which allows users to open or close the wall fully. Clicking the on-off button either opens or closes the airwall. These can either be fully open or fully closed, they cannot be partially opened so to partially divide a space it is best to take a room dividing object from the Visrez library.
Carpet & Flooring
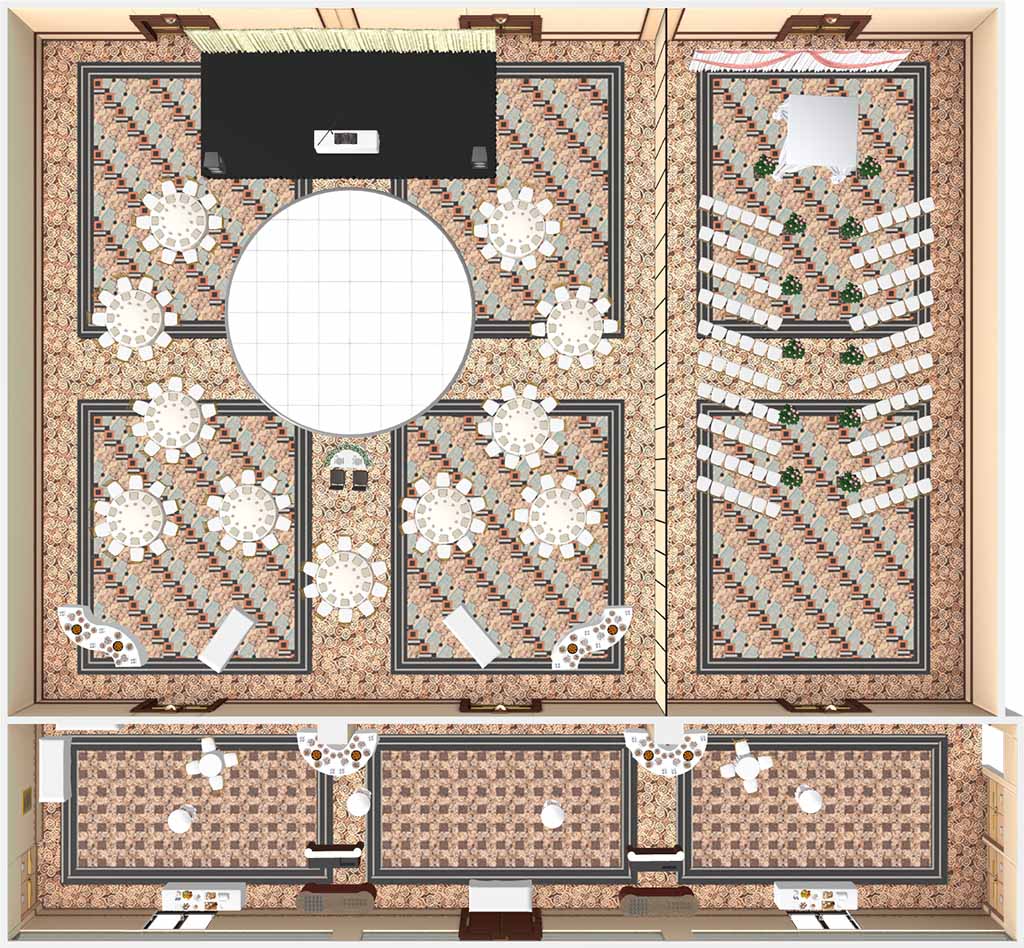
The carpets and flooring elements in a space can also be deactivated using the layers tool as quite often the design pattern on carpets can be quite busy and make it difficult to view the furniture in the plan. As you can see in this example the chivari chairs are hard to make out as they blend with the pattern of the carpet.
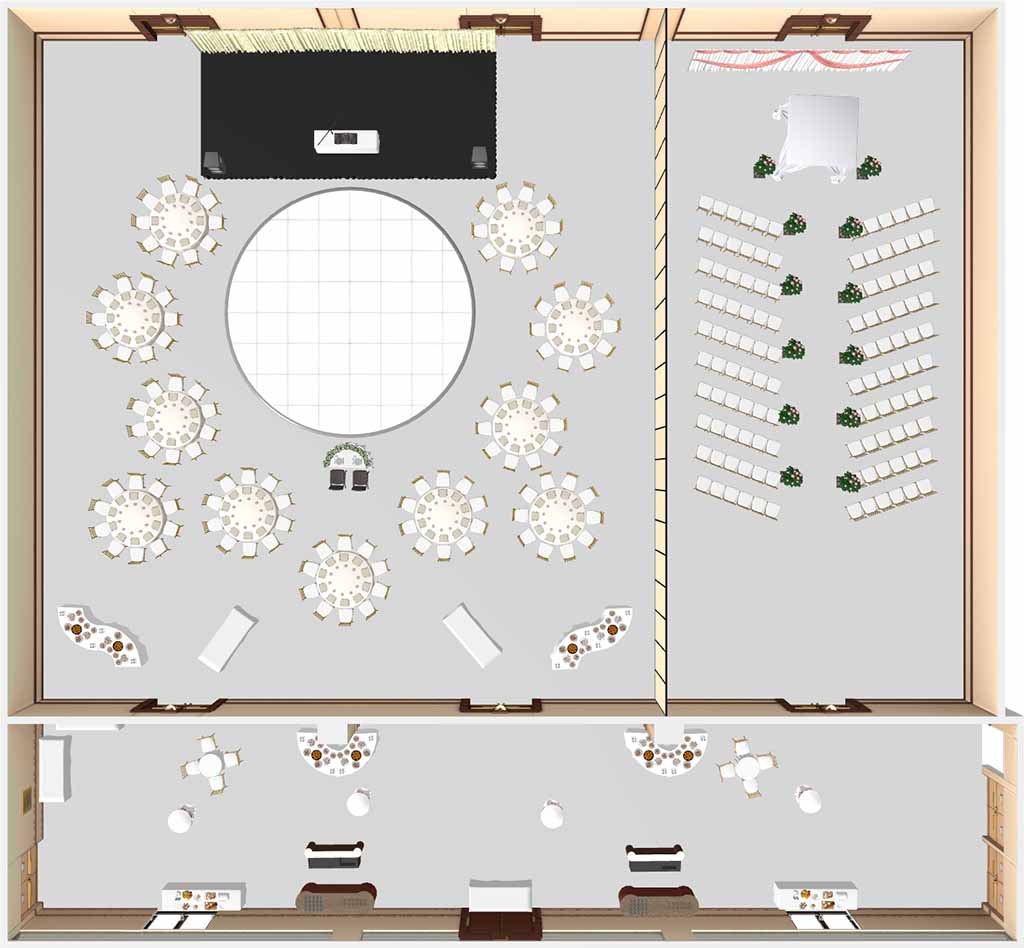
Using the layers tool to switch off the carpet in this view makes it easier to understand the set up in the plan as the grey background provides a higher contrast against the white objects used in the 3D event diagram.
Fixed Seating Layers
In some event spaces there can be fixed seating elements which can be removed as a block to allow different furniture to be set-up in those areas. This functionality can be replicated using the airwall control to allow users to remove all the seating blocks with one click.
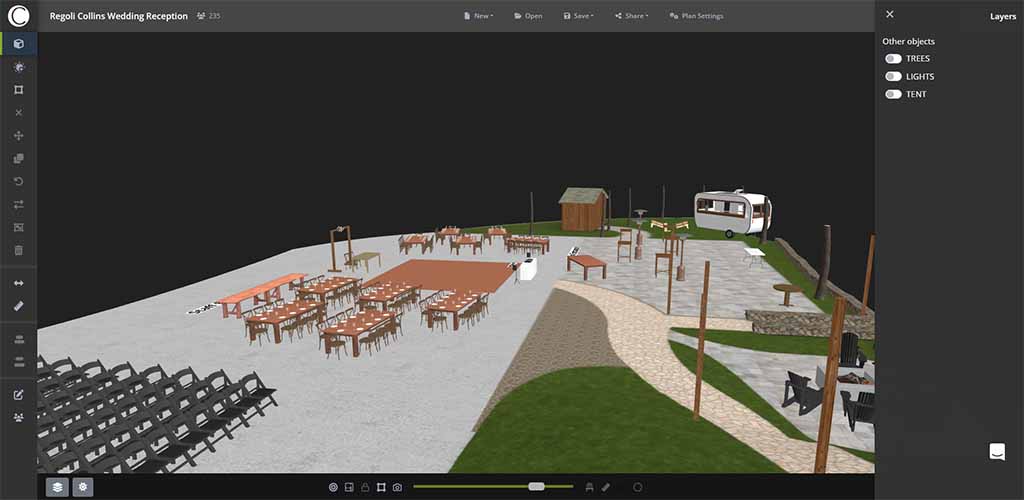
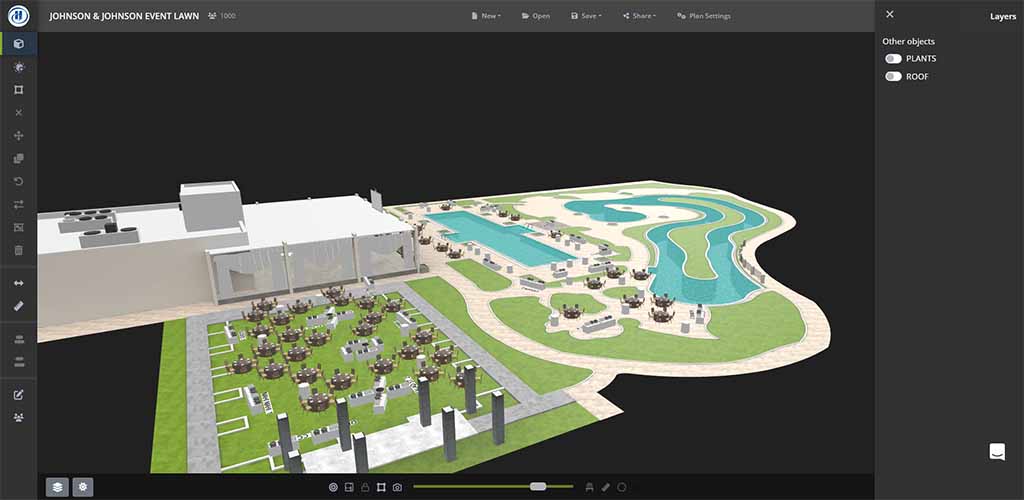
Layers in Outdoor Spaces
In outdoor event spaces layers can be used to switch off elements such as trees, string lights or fixed objects such as tents, gazebos or catering trucks to allow you to build the plan without the distraction of these elements in your view. Then when you have completed the set-up you can switch these elements back on using the layer controls.

Trees although are not moveable objects in real life if you don’t want these to feature in the exports you can switch them off using the layer control. If a tent structure is always positioned in the same area then you can have this as a layer in your plan and just turn it on when you want to show the tent.
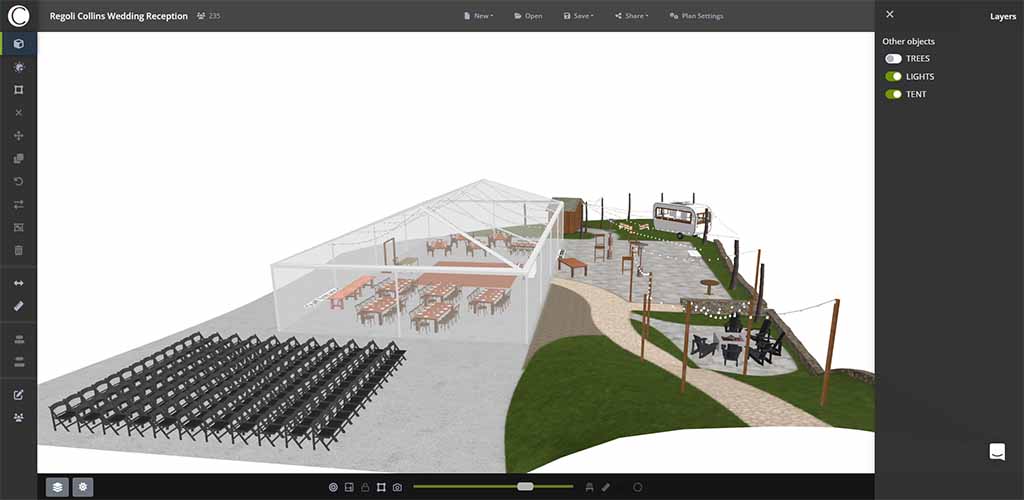
If a tent is always positioned in the same area then you can have this as a layer in your plan and just turn it on when you want to show the tent. This allows you to focus on the furniture by switching off the text using the layers tool.
In this event plan you can see the palm trees are quite dense and obscure some of the event space so by switching them off in the layers tool you get a much clearer view of the available space for the set up.
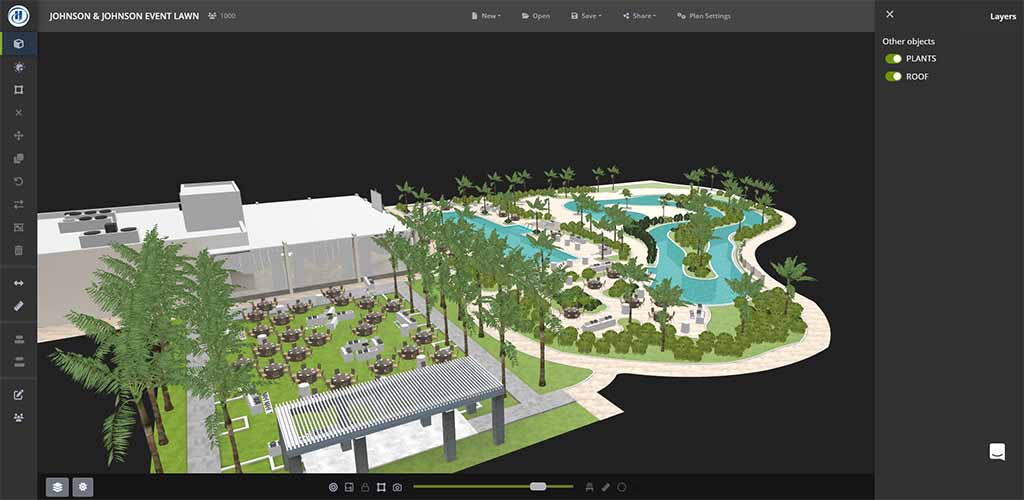
In this event plan you can see the palm trees are quite dense and obscure some of the event space so by switching them off in the layers tool you get a much clearer view of the available space for the set up.
Please note as we release new versions some menu items may move or change position.